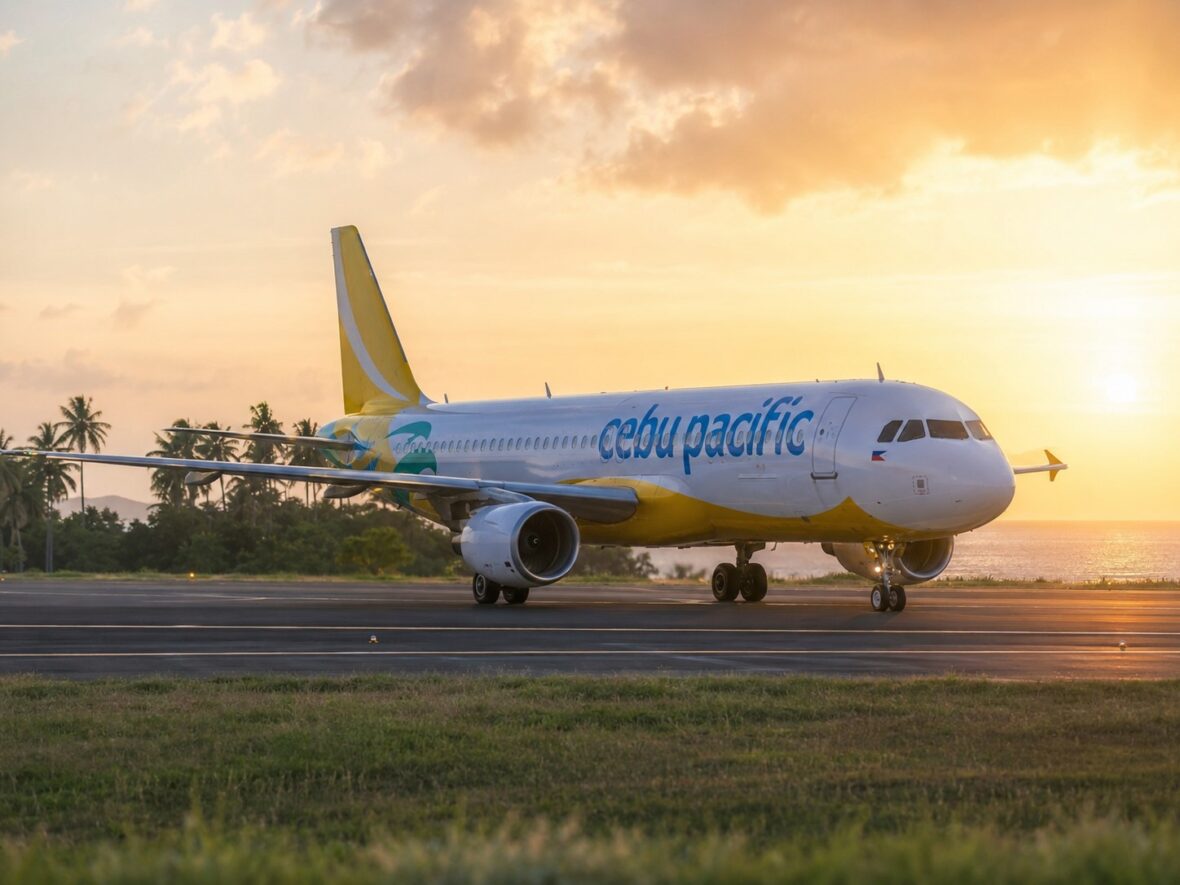
Flying internationally with Cebu Pacific is exciting, but it also comes with more steps than a domestic flight.
For domestic travel, you usually just need your valid ID, boarding pass, and baggage. But for international flights, you need to think about your passport, visa, eTravel, immigration, travel tax, customs declaration, baggage rules, and destination-specific requirements.
This is why international travel can feel intimidating, especially for first-time flyers.
Maybe you’re flying to Singapore, Bangkok, Hong Kong, Taipei, Tokyo, Seoul, Dubai, Sydney, Melbourne, Vietnam, or another Cebu Pacific international destination. Maybe it’s your first trip abroad. Maybe you’re worried about immigration. Maybe you’re not sure when to arrive at the airport or what documents to prepare.
Don’t worry. In this guide, let’s go through Cebu Pacific international travel in a simple, practical, and beginner-friendly way.
Content
What Is a Cebu Pacific International Flight?
A Cebu Pacific international flight is any flight that leaves the Philippines and arrives in another country or territory, or a flight from another country going back to the Philippines.
Examples include Manila to Singapore, Manila to Bangkok, Manila to Hong Kong, Manila to Taipei, Manila to Tokyo, Manila to Seoul, Manila to Dubai, Manila to Sydney, Manila to Melbourne, Manila to Da Nang, Manila to Jakarta, and similar routes.
International flights have more requirements because you are crossing borders. That means airline check-in is just one part of the process. You also need to pass immigration, follow customs rules, and meet the entry requirements of your destination country.
Cebu Pacific’s International Travel Guide says passengers should check visa and entry details through its travel requirement tool, and if a destination is not listed in its guide, it means there are no specific Cebu Pacific-listed restrictions or special requirements for that destination.
Book Directly When Possible
For international trips, booking directly with Cebu Pacific can make things easier.
When you book directly, your itinerary, booking reference, payment details, flight updates, add-ons, and Manage Booking options are easier to access through Cebu Pacific’s website or app.
This is important because international travel plans can change. You may need to add baggage, update passport details, check in online, buy meals, add insurance, select seats, or manage a flight disruption.
Cebu Pacific’s Manage Booking feature allows passengers to view their itinerary, rebook, check in online, update guest details, add baggage, settle pending balances, purchase add-ons, convert eligible bookings to Travel Fund, request refunds, and more; Cebu Pacific also says bookings can only be managed up to two hours before the flight.
Check Your Passport First
Before booking an international Cebu Pacific flight, check your passport.
Cebu Pacific’s check-in guide reminds passengers to make sure their passport is valid for at least six months beyond the scheduled trip.
This is very important because many countries require passport validity beyond your travel dates. If your passport is expiring soon, renew it before booking or before your trip gets too close.
Also check that your passport name matches your Cebu Pacific booking name. For international flights, name accuracy matters a lot because your ticket should match your passport.
Don’t use a nickname. Don’t guess your passport name. Open your passport and copy the name carefully.
Check If You Need a Visa
Some destinations are visa-free for Filipino travelers. Others require a visa before departure. Some may require electronic travel authorization, arrival cards, or other entry documents.
Cebu Pacific’s check-in guide tells passengers to check whether they need a visa or transit visa for their trip, and its International Travel Guide points travelers to Cebu Pacific’s travel requirement tool for visa and entry details.
This is one of the biggest international travel reminders.
Do not assume you can fly just because you have a ticket.
The airline may deny boarding if you do not have the required visa, transit visa, onward ticket, passport validity, or destination documents. Immigration officers can also ask questions before allowing you to depart or enter.
Always check your destination’s latest requirements before booking and again before departure.
Prepare Your Destination Requirements
International requirements can change depending on the country.
Some destinations may require a visa. Some may require an arrival card. Some may ask for proof of hotel booking, return ticket, vaccination certificate, invitation letter, or enough funds. Some may have customs rules about food, medicine, cash, tobacco, alcohol, electronics, or other items.
Cebu Pacific’s International Travel Guide lists destinations such as Australia, Brunei, China, Hong Kong, Indonesia, Japan, Malaysia, Singapore, South Korea, Taiwan, Thailand, United Arab Emirates, and Vietnam.
The safe approach is simple: check your destination’s requirements before you fly.
For example, requirements for Japan may be different from Thailand. Requirements for Dubai may be different from Singapore. Requirements for South Korea may be different from Taiwan.
Do not rely only on old blog posts or old TikTok videos. Use official airline, embassy, immigration, or government sources.
Complete eTravel Before Departure or Arrival
If you are departing from or arriving in the Philippines, eTravel is one of the most important requirements to remember.
Cebu Pacific says all passengers entering the Philippines and all Filipino passengers departing from the Philippines are required to accomplish the PH eTravel and Customs Declaration within 72 hours before departure or arrival.
Cebu Pacific’s eTravel guide also explains that the Philippine eTravel System is a government web-based platform that consolidates health declarations, immigration clearance, customs declarations, and travel tax declaration and payment. It says all passengers entering the Philippines and all Filipino passengers departing the Philippines must complete the eTravel form within 72 hours, or three days, before scheduled arrival or departure.
So if you are a Filipino flying from Manila to Singapore, you need eTravel before departing the Philippines.
If you are coming back from Bangkok to Manila, all passengers entering the Philippines need eTravel before arrival.
What Is eTravel?
eTravel is the Philippine government’s online system for international travelers.
It is not a Cebu Pacific form only. It is a government requirement.
Cebu Pacific says eTravel is accessible through the official eTravel website and is also integrated into the eGovPH app.
After completing eTravel, save your QR code. Take a screenshot. Keep it accessible offline.
Don’t wait until you are already at the airport if you can do it earlier. Cebu Pacific says you can register from home or at the airport before check-in, but it is highly recommended to do it in advance to avoid delays.
Do Foreigners Need eTravel?
Yes, if they are entering the Philippines.
Cebu Pacific says all passengers entering the Philippines, including Philippine passport holders, foreign nationals, and airline crew, must complete the eTravel form. It also says all Filipino passengers departing the Philippines are required to complete it.
So the simple rule is:
If you are entering the Philippines, complete eTravel.
If you are a Filipino leaving the Philippines, complete eTravel.
If you are a foreign national leaving the Philippines, check the current rule because the main requirement highlighted by Cebu Pacific is for all entering passengers and Filipino departing passengers.
Customs Declaration and Cash Declaration
eTravel is not only about immigration or health declarations. It also includes customs-related declarations.
Cebu Pacific’s International Travel Guide says passengers carrying more than PHP 50,000 or USD 10,000, or the equivalent in other currencies, must declare the amount when filling out eTravel details. For Philippine currency, passengers must secure authorization from the Bangko Sentral ng Pilipinas. Non-declaration or false declaration may lead to confiscation and/or legal action.
This is important for travelers carrying large amounts of cash.
If you are not carrying that much, you simply answer the form honestly. But if you are carrying more than the allowed declaration threshold, don’t hide it. Follow the customs rules.
Philippine Travel Tax
If you are a Filipino citizen traveling internationally, you may need to pay Philippine Travel Tax unless you are exempt or eligible for a reduced rate.
Cebu Pacific has a dedicated Help Center section for Service Fees and Philippine Travel Tax, including Travel Tax exemptions, how to pay Travel Tax on the Cebu Pacific app, how to pay through the eGovPH app, and refund concerns for Travel Tax.
This is separate from baggage, seat selection, and airfare.
Before your international flight, check if Philippine Travel Tax is already included in your Cebu Pacific booking. If not, check how you can pay it before going to the airport.
If you are an OFW, Filipino permanent resident abroad, infant, or another exempt category, check the official exemption process and prepare documents.
Check Your Terminal
Before leaving for the airport, check your terminal carefully.
Cebu Pacific’s terminal guide lists Manila flights under Ninoy Aquino International Airport Terminal 3 for Cebu Pacific 5J flights. It also notes that starting March 29, 2026, all Cebgo DG and AirSWIFT T6 flights depart from and arrive at Clark International Airport.
Do not assume. Always check your itinerary.
For Cebu flights, Cebu Pacific’s terminal guide lists Mactan-Cebu International Airport Terminal 1 for domestic flights and Terminal 2 for international flights.
This matters because going to the wrong terminal can ruin your trip, especially for international flights where airport counters close earlier and immigration screening takes time.
How Early Should You Arrive for Cebu Pacific International Flights?
Cebu Pacific’s International Travel Guide says international airport counters close one hour before departure and passengers should arrive at the airport three hours before their flight schedule.
During peak travel season, arrive even earlier. Cebu Pacific’s peak travel guide recommends arriving at the airport at least four hours before international flights during peak periods.
So here’s the simple rule:
Normal international flight: arrive at least 3 hours before departure.
Peak season international flight: arrive at least 4 hours before departure.
If you are traveling with kids, seniors, PWD passengers, a big group, special baggage, or visa-required documents, give yourself even more time.
Why You Should Not Arrive Late
International travel has more steps than domestic travel.
You need time for terminal entry, check-in or bag drop, document verification, travel tax if needed, immigration, security screening, walking to the gate, and boarding.
Even if you already checked in online, international flights may still require document verification at the airport. Cebu Pacific’s check-in guide says that if a digital boarding pass is not immediately issued after online check-in, it may be because current visa regulations require further verification by staff, and passengers should proceed to airport counters for assistance.
So don’t arrive late and assume online check-in solves everything.
For international flights, the airport process can take longer than expected.
Cebu Pacific Online Check-In for International Flights
Cebu Pacific online check-in opens 48 hours before departure for international flights and closes 2 hours before departure.
This is useful because it can save time and help you get your boarding pass earlier.
You can check in through the Cebu Pacific app or website. Cebu Pacific encourages passengers to check in with the app because they can download their digital boarding pass there.
But remember: online check-in does not replace immigration, security, or document checks.
If you have checked baggage, you still need to drop your bags. If your destination requires visa verification, you may still need to proceed to a staffed counter.
Who Cannot Check In Online?
Not everyone can check in online.
Cebu Pacific says online check-in is not available for unaccompanied minors, guests requiring mobility or medical assistance or having a travel request, group bookings with more than 20 passengers, passengers with outstanding balances, tax-exempt guests such as OFWs, and passengers who have not selected an option for disrupted flights. These passengers should proceed to airport counters for further verification.
If online check-in does not work for you, don’t panic.
It may simply mean your booking needs verification. Go to the airport early and line up at the proper counter.
What to Do at NAIA Terminal 3
If your Cebu Pacific 5J international flight departs from NAIA Terminal 3, Cebu Pacific says passengers should enter through Gates 5 and 6, then proceed to the check-in kiosks between Aisles A and B. If you have no bags to check in, you can head straight to security or immigration gates. If you have bags, you can use the Self Bag Drop Kiosks at Aisle A.
During peak travel periods, Cebu Pacific says passengers going to visa-required destinations should proceed to staffed counters, and counter assignments may be adjusted depending on passenger volume.
So even if you know the usual process, always check the monitors and ask staff if you are unsure.
Documents to Prepare for International Travel
For Cebu Pacific international flights, prepare your documents before airport day.
At minimum, you should have:
Passport
Boarding pass or itinerary receipt
Visa, if required
eTravel QR code, if required
Return or onward ticket, if needed
Hotel booking or address abroad
Travel insurance, if required or preferred
Invitation letter, if applicable
Company ID or certificate of employment, if useful
Proof of funds, if needed
Travel tax receipt or exemption documents, if applicable
Senior Citizen, PWD, OFW, or other documents if relevant
Cebu Pacific specifically reminds passengers to check passport validity and visa or transit visa needs before travel.
Your documents should be easy to access. Do not pack your passport or visa papers inside checked baggage.
Immigration Tips for Filipino Travelers
Philippine immigration screening can feel intimidating, especially for first-time travelers.
The best advice is to be honest, calm, and prepared.
Know your itinerary. Know your destination. Know where you are staying. Know your return date. Have your documents ready. Answer questions directly.
You don’t need to over-explain. Just answer what is asked.
Common documents immigration officers may ask for include passport, boarding pass, return ticket, hotel booking, travel itinerary, company ID, certificate of employment, school ID, invitation letter, proof of relationship, or proof of funds, depending on your situation.
Requirements can vary by traveler and destination, so prepare documents that support the purpose of your trip.
First-Time International Flyer Tips
If it’s your first time flying internationally, give yourself extra time.
Arrive early. Don’t book tight airport transfers. Don’t pack at the last minute. Don’t assume the airport will be quick.
Before departure day, check your passport validity, visa, eTravel, Travel Tax, terminal, baggage, and destination requirements.
At the airport, follow this basic flow:
Enter the correct terminal.
Check in or drop baggage.
Pay or verify Travel Tax if needed.
Go to immigration.
Pass security screening.
Find your boarding gate.
Wait for boarding announcements.
Board the plane.
Keep your passport and boarding pass accessible until you are seated.
Baggage for International Flights
International flights often need more careful baggage planning than domestic flights.
Cebu Pacific’s baggage guide says GO Basic has no checked baggage, while GO Easy and GO Flexi include one 20kg checked baggage allowance; checked baggage can also be purchased as an add-on.
Before flying internationally, check your baggage allowance in your itinerary.
Do not assume you have checked baggage. Many Cebu Pacific fares are low-cost fares, and baggage may be optional depending on your bundle.
If you need checked baggage, buy it before the airport. Cebu Pacific’s peak travel guide also reminds passengers to purchase baggage online because it can save money compared with buying at the airport.
Hand-Carry for International Flights
Your hand-carry should contain your essentials.
Bring your passport, phone, wallet, boarding pass, eTravel QR code, visa documents, hotel booking, medicines, power bank, gadgets, chargers, valuables, jacket, and important papers.
Do not place passports, money, medicines, laptops, cameras, jewelry, or power banks inside checked baggage.
For international flights, liquids, aerosols, and gels may be restricted at airport security depending on airport rules. To avoid problems, keep liquids in small containers and check the airport’s security guidelines before departure.
If you buy drinks after security, finish or carry them according to the airport and airline rules.
Power Bank Reminder
For international flights, power banks should be packed properly.
Cebu Pacific has a dedicated Power Bank Limitations guide, and power banks are usually treated as hand-carry items because of lithium battery safety rules. If you use power banks, check Cebu Pacific’s current power bank policy before flying.
This is especially important for travelers bringing phones, cameras, laptops, action cameras, drones, or multiple gadgets.
Don’t put power banks in checked baggage.
Special Baggage for International Flights
If you’re bringing surfboards, sports equipment, musical instruments, oversized bags, religious items, or other special baggage, check Cebu Pacific’s special baggage rules before your flight.
Cebu Pacific says CEB Special Baggage is available up to two hours before the flight through the Cebu Pacific app, and each passenger is allowed one of each kind of special baggage with 20kg allowance; availability may be limited, especially on Cebgo flights because of limited space.
Don’t bring special items to the airport without checking rules first.
For international travel, also check the destination country’s restrictions for certain items.
Food, Medicine, and Customs Rules
Be careful with food and medicine when traveling internationally.
Some countries are strict about bringing fresh food, meat, fruits, vegetables, plants, seeds, dairy, supplements, prescription medicine, or controlled substances.
Even if an item is allowed in your baggage by the airline, it may still be restricted by your destination country.
For medicines, bring prescriptions if needed. Keep medicines in original packaging when possible. Carry essential medicines in your hand-carry.
When in doubt, declare honestly and check official customs rules.
Connecting International Flights
If you have connecting flights, check if they are on the same booking or separate bookings.
Cebu Pacific says that for connecting flights on the same booking, passengers should receive two boarding passes at initial check-in. For flights on separate bookings or different airlines, passengers need to check in again at the layover airport.
For baggage, Cebu Pacific says baggage is checked through to the final destination for flights on the same booking, except when entering the Philippines. If your international origin enters the Philippines as the final destination, you must claim baggage at the layover airport, clear customs with baggage, proceed to the Transfer Desk near Customs to endorse baggage, then go to the pre-departure area for the next flight.
If your flights are on separate bookings, you need to collect your baggage and re-check it for the next flight.
Domestic to International Connection
If you are flying from a Philippine province to Manila, then from Manila to another country, check your connection carefully.
If the flights are on the same booking, the process may be easier.
If they are separate bookings, you need enough time to collect baggage, check in again, pay or verify travel tax if needed, pass immigration, and go through security.
Cebu Pacific’s connecting flight guide says that for Domestic–Domestic–International routes, immigration screening happens at the layover or second airport.
For example, if you fly Davao to Manila to Tokyo, your immigration process may happen in Manila, not Davao.
Do not book a very tight connection.
International to Domestic Connection
If you arrive in the Philippines from abroad and have a connecting domestic flight, you need to clear arrival procedures.
Cebu Pacific says that even if connecting flights are on the same booking, passengers entering the Philippines must claim baggage at the layover airport, clear customs with baggage, proceed to the Transfer Desk near Customs to endorse baggage, and go to the pre-departure area for the next flight.
For example, if you fly Tokyo to Manila to Dumaguete, you need to handle arrival procedures in Manila first.
This is why enough layover time matters.
What If Your International Flight Is Delayed or Canceled?
International flight disruptions can happen because of weather, airport congestion, technical concerns, operational issues, or air traffic restrictions.
If this happens, check Cebu Pacific’s official notifications, email, SMS, app, Manage Booking, airport screens, and announcements.
Cebu Pacific’s disruption guide says affected passengers are notified by frontline teams, email, and/or text message, and disrupted flights can be managed through Cebu Pacific’s self-service disruption options.
Read your options carefully. Depending on the case, you may be able to rebook, request refund, or convert to Travel Fund.
For international trips, also consider your hotel booking, visa validity, connecting flights, tours, and arrival transport if your schedule changes.
What If Immigration Denies Boarding or Entry?
Immigration issues are different from regular flight delays.
If Philippine immigration does not allow you to depart, or if a destination country denies entry, the airline may not be responsible for all costs.
Cebu Pacific’s refund guidance includes immigration denial as a listed refund concern and says that if you have been denied entry by immigration, you should approach Cebu Pacific at airport counters for assistance or chat through the app or website to connect with a live agent.
The best way to avoid immigration problems is to prepare documents, answer honestly, and check entry requirements before your flight.
Travel Insurance for International Flights
Travel insurance is worth considering for international travel.
Cebu Pacific offers CEB TravelSure as an optional insurance add-on in partnership with Chubb Travel Insurance, but availability and coverage depend on the country and policy.
Even if you don’t buy CEB TravelSure, consider getting travel insurance from another provider, especially for medical emergencies, trip disruptions, baggage issues, and longer trips.
Some destinations or visa types may require travel insurance, so check before flying.
Cebu Pacific International Destinations
Cebu Pacific’s current Help Center destination list includes international airports such as Melbourne Terminal 2, Sydney Terminal 1, Brunei main terminal, Guangzhou Terminal 3, Shanghai Pudong Terminal 2, Hong Kong, Jakarta Terminal 2F, Bali International Terminal, Fukuoka, Osaka Kansai Terminal 1, Nagoya Terminal 2, Tokyo Narita Terminal 2, Kuala Lumpur Terminal 2, Riyadh Terminal 5, Singapore Changi Terminal 4, Incheon Terminal 1, Taipei Terminal 1, Bangkok Suvarnabhumi, Bangkok Don Mueang Terminal 1, Dubai Terminal 1, and Da Nang Terminal 2, among others.
This list can change, so always check your actual itinerary and Cebu Pacific’s airport guide before travel.
Airport terminal details are very important abroad because some airports are huge. Going to the wrong terminal can waste time and cause stress.
Cebu Pacific International Airport Arrival Tips
When you arrive abroad, follow the airport signs.
You will usually go through immigration, baggage claim, and customs before exiting the airport.
Prepare your passport, arrival card if required, visa if required, hotel address, and return ticket.
If an officer asks questions, answer calmly and directly.
After immigration, check the baggage carousel for your flight. Keep your baggage tag until you have your bag.
Before exiting customs, make sure you are not carrying restricted items.
For transportation, use official airport counters, official ride-hailing apps, airport trains, buses, or trusted transfers.
Returning to the Philippines
When returning to the Philippines, remember eTravel again.
Cebu Pacific says all passengers entering the Philippines are required to accomplish PH eTravel and Customs Declaration within 72 hours before arrival.
This applies to Filipino travelers and foreign nationals entering the Philippines.
Before your return flight, complete eTravel, save the QR code, check baggage, and arrive at the foreign airport early.
Also check your Cebu Pacific terminal abroad. Some airports have multiple terminals, and Cebu Pacific may use a specific one.
Common Cebu Pacific International Travel Mistakes
The first mistake is not checking passport validity. Cebu Pacific reminds passengers to make sure the passport is valid for at least six months beyond the scheduled trip.
The second mistake is assuming visa-free entry without checking. Cebu Pacific advises passengers to check visa or transit visa requirements before travel.
The third mistake is forgetting eTravel. Cebu Pacific says all entering passengers and all Filipino departing passengers must complete eTravel within 72 hours before arrival or departure.
The fourth mistake is arriving too late. Cebu Pacific says international counters close one hour before departure and recommends arriving three hours before the flight; during peak season, it recommends four hours for international flights.
The fifth mistake is not checking baggage allowance. Don’t assume checked baggage is included.
The sixth mistake is booking tight connections, especially separate bookings.
The seventh mistake is putting documents, medicine, money, power banks, or valuables in checked baggage.
The eighth mistake is not checking customs rules for food, medicine, cash, or restricted items.
The ninth mistake is going to the wrong airport or terminal.
The tenth mistake is relying only on mobile data to access important documents. Always save screenshots offline.
Cebu Pacific International Travel Checklist
Before your flight, check your passport validity.
Check if you need a visa or transit visa.
Check destination entry requirements.
Complete eTravel within 72 hours if required.
Check Travel Tax payment or exemption.
Check your terminal.
Check in online if eligible.
Save your boarding pass.
Prepare your passport and travel documents.
Check your baggage allowance.
Add baggage online if needed.
Prepare your immigration documents.
Save hotel booking and return ticket.
Bring travel insurance if needed.
Arrive at the airport at least three hours before departure, or four hours during peak season.
Go through check-in, immigration, security, and boarding calmly.
My Practical Advice
For international Cebu Pacific flights, preparation is everything.
Don’t treat it like a domestic flight. You need more time, more documents, and more awareness of rules.
My simple advice is this: prepare your documents at least a few days before departure. Don’t wait until the night before to check passport validity, visa, eTravel, travel tax, baggage, and terminal.
On flight day, arrive early. Keep your passport and documents in one pouch. Save screenshots of everything. Bring a pen, power bank, and printed backups if you want extra peace of mind.
International travel is not scary when you are prepared.
Final Thoughts
Cebu Pacific international travel has more steps than domestic travel, but it becomes much easier when you know what to prepare.
Before your flight, check your passport validity, visa or transit visa requirements, destination documents, eTravel, Travel Tax, baggage, terminal, and check-in window.
Cebu Pacific says online check-in for international flights opens 48 hours before departure and closes two hours before departure. Airport counters for international flights close one hour before departure, and passengers are advised to arrive at the airport three hours before their flight schedule.
During peak travel periods, Cebu Pacific recommends arriving at least four hours before international flights.
For eTravel, remember that all passengers entering the Philippines and all Filipino passengers departing from the Philippines must complete the form within 72 hours before arrival or departure.
The key is simple: don’t rush, don’t guess, and don’t rely on memory. Check official requirements, arrive early, keep your documents ready, and save offline copies of your booking, boarding pass, eTravel QR code, and hotel details.
Once you prepare properly, your Cebu Pacific international flight can feel much smoother from check-in to immigration to boarding to arrival.