Getting an NBI Clearance is one of those things many Filipinos will eventually have to do, especially when applying for a job. The good news is that the process is much easier today than it was years ago.
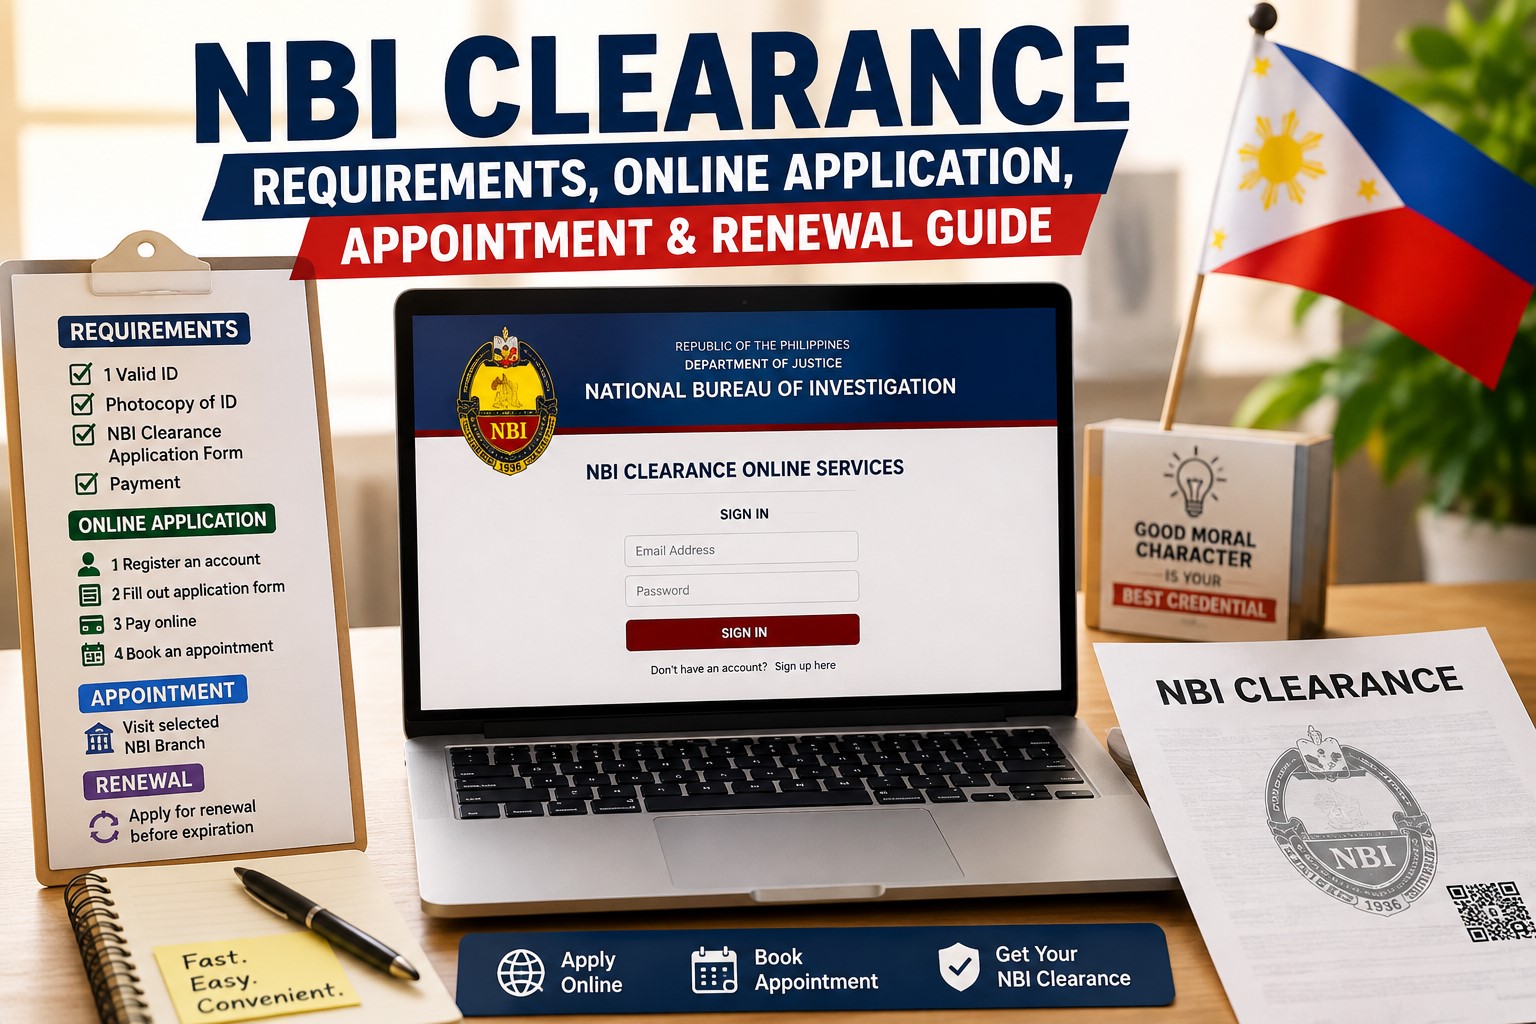
You don’t have to arrive at an NBI office early in the morning just to fill out an application form and hope you’ll be accommodated. In 2026, the process starts online: you create an account, complete your information, choose an NBI branch, schedule an appointment, pay the required fee, and then visit the branch for biometrics and release.
And there’s another major improvement this year.
In July 2026, the National Bureau of Investigation launched NBI eClearance through the eGovPH Super App, allowing eligible users to renew and access their clearance digitally. According to the NBI, eligible users can complete renewal in as little as five minutes through the app.
So whether you’re applying for your first NBI Clearance, getting another one for work, or renewing an old clearance, this guide explains what you need to know.
Updated: August 2026. NBI procedures, fees, payment partners, and online services can change. Always check the official NBI website and clearance portal before completing your transaction.
Content
What Is an NBI Clearance?
An NBI Clearance is a document issued by the National Bureau of Investigation after checking an applicant against the NBI’s criminal-record database.
For many Filipinos, it’s most familiar as a pre-employment requirement. Companies may ask for one before hiring an employee, while it can also be requested for various transactions where background verification is needed.
The current NBI clearance system combines an online application with identity verification at an NBI clearance center. For regular applications, you register and pay online before going to your selected NBI branch.
NBI Clearance Requirements in 2026
For a regular NBI Clearance application, prepare the following:
- Online NBI Clearance account
- Completed application
- Appointment/reference number
- Proof of payment
- Two valid government-issued IDs
- Personal appearance for biometrics if you’re applying through the standard process
The NBI’s current application guide specifically instructs applicants to bring their reference number or QR code, proof of payment, and two original, unexpired government-issued IDs when visiting the branch.
Examples of IDs listed by the NBI
The NBI currently gives examples including:
- Philippine Passport
- Driver’s License
- National ID
- UMID
- Postal ID
- PSA Birth Certificate
Your documents should be original and valid where applicable.
If you have several IDs, I’d bring more than the minimum. There’s no harm in having a backup, especially when you’re already making the trip to an NBI branch.
How Much Is NBI Clearance in 2026?
The current basic NBI Clearance fee is ₱130.
However, you’ll normally pay an additional electronic-payment service or convenience charge. The NBI’s current guide says this is generally around ₱25 to ₱30, depending on the payment channel.
So a typical transaction may look something like this:
| Charge | Amount |
|---|---|
| NBI Clearance fee | ₱130 |
| E-payment/service fee | Usually around ₱25–₱30 |
| Approximate total | ₱155–₱160 |
The actual amount displayed during your transaction is what you should follow because convenience fees and payment arrangements can change.
Is NBI Clearance Free for First-Time Jobseekers?
Yes—if you qualify under the First Time Jobseekers Assistance Act.
Republic Act No. 11261 waives government fees for several documents normally required when applying for a first job, including NBI Clearance. The benefit can generally be availed of once by an eligible first-time jobseeker.
The NBI also has a dedicated process for first-time jobseekers.
According to its Citizen’s Charter, applicants need:
- A Barangay Certification showing first-time jobseeker status
- Two valid government-issued IDs or acceptable certificates
The NBI charges no clearance fee for qualified applicants under this program.
The NBI’s regular application guide also advises first-time jobseekers to use the dedicated First-Time Jobseekers portal rather than the ordinary clearance registration process.
So if this is your first time applying for work, check this option before paying.
How to Apply for NBI Clearance Online in 2026
For a regular application, the process can be divided into two parts:
Online application
and
NBI branch processing
Here’s how it works.
Step 1: Go to the Official NBI Clearance Portal
Start through the official National Bureau of Investigation website and access the NBI Clearance Application Portal from there.
The NBI specifically directs online applicants to its official clearance portal.
Be careful when searching online.
You’ll see plenty of websites with “NBI Clearance” in their names. Some may simply be guides, while others can look surprisingly similar to an official service.
For the actual application, use the portal linked by NBI.gov.ph.
Step 2: Register or Log In
If you’ve never created an NBI Clearance account, register first.
The current NBI registration process requires an active:
- Mobile number
- Email address
You’ll receive an OTP or one-time password to verify your registration.
If you already have an account, log in instead.
Don’t create multiple accounts unnecessarily if you can still access your existing one.
Step 3: Complete Your Applicant Information
After logging in, complete your profile.
The NBI says the Applicant Information Form includes personal information and other details such as family background and education or employment information.
Take this part seriously.
Check:
- First name
- Middle name
- Last name
- Suffix
- Birthday
- Birthplace
- Address
- Civil status
- Other personal details
Your name should match the IDs you’ll bring to the NBI office.
A typo here can create unnecessary headaches later.
Before proceeding, review your profile carefully and save the information.
Step 4: Click “Apply for Clearance”
Once your profile is complete, choose Apply for Clearance.
The NBI system will ask you to indicate which valid government ID you intend to present at the branch.
Select the appropriate ID and proceed with your application.
Step 5: Choose Your NBI Branch
Next, choose the NBI branch where you want your clearance processed.
Don’t automatically choose the first branch that appears.
Consider:
- Distance
- Transportation
- Parking, if you’re driving
- Available appointment dates
- How busy the location may be
- Whether another NBI branch is easier to reach
The NBI maintains an official clearance-office locator to help applicants find nearby branches. It also advises applicants to complete their online application and payment before visiting an NBI office.
Step 6: Choose Your Appointment
Select your preferred available appointment date.
The current system lets you choose an available date and an AM or PM time slot.
Once you’ve chosen your schedule, move to payment.
What if you miss your NBI appointment?
There’s a useful detail in the NBI’s current guide.
Once your transaction is marked PAID, the NBI says recent system updates generally provide a 15-day grace period, meaning you can typically visit your selected branch within 15 days of the target appointment window if you missed the original date.
Still, I wouldn’t intentionally miss your schedule.
Go on the date you selected whenever possible.
Step 7: Choose a Payment Method
The NBI’s current guide lists payment options including:
- GCash
- Maya
- 7-Eleven
- Bayad Center
- Online banking
Available payment channels can change, so check what appears on the portal during your application.
After selecting a payment method, the system will generate a Reference Number.
This is extremely important.
Save it.
I recommend doing three things:
- Screenshot it.
- Save the screenshot to your phone.
- Write or copy the reference number somewhere else.
The NBI describes the reference number as an important part of both payment and branch processing.
Step 8: Pay the NBI Clearance Fee
Pay the amount indicated by the system.
For a normal applicant, the base fee is currently:
₱130
plus the applicable payment service charge.
After completing payment, check your NBI account.
Your transaction should eventually show as PAID.
Save your receipt or payment confirmation.
Step 9: Prepare for Your NBI Appointment
Before heading to the branch, prepare:
- Two valid government-issued IDs
- NBI reference number or QR code
- Proof of payment
- Appointment information
The NBI specifically lists these among the items applicants should bring for branch processing.
If you’re a first-time jobseeker
Also bring the required Barangay Certification. The NBI’s guidance additionally refers first-time jobseekers to the requirements associated with the special free-clearance process.
Step 10: Go to Your NBI Branch
Go to the branch you selected.
If your online transaction has already been paid, you don’t normally need to start the entire application again at the branch.
The NBI’s Citizen’s Charter shows that e-payment applicants proceed to biometric and image capture, followed by clearance printing if there are no issues.
Follow the instructions or queue numbers provided at your branch.
Step 11: Biometrics and Photo Capture
At the appropriate counter, NBI personnel will process your biometrics.
This includes:
- Digital fingerprints
- Photograph
- Electronic signature
The NBI also advises applicants to verify their personal details on-screen before the clearance is printed.
Pay attention here.
Check your:
- Name
- Birth date
- Birthplace
- Address
- Other displayed information
If something is incorrect, say so before the document is printed.
Step 12: Wait for the NBI “HIT” Check
After biometric processing, your details are checked against the NBI database.
At this point, you’ll generally encounter one of two situations.
No Hit
If there is no hit, the NBI says you can proceed to printing and receive your clearance.
This is why some NBI transactions feel surprisingly fast once you’re already inside the branch.
With Hit
You may instead be told that your application has a HIT.
This sounds alarming, but don’t automatically assume the worst.
The NBI explains that a hit can occur when your name is similar or identical to a name associated with a record in its database. The application then needs manual verification.
The current NBI guide says applicants with a hit are generally told to return after a specified period, usually around five to ten working days, to allow reviewers to verify the record. No additional clearance fee is required simply because of the hit.
Does Having a “Hit” Mean You Have a Criminal Record?
No, not necessarily.
A hit can simply mean the system found a record associated with the same or a similar name.
This is particularly possible if you have a common Filipino name.
The purpose of the additional verification is to determine whether the database record actually belongs to you. The NBI’s clearance procedure distinguishes between applications with no hit and those requiring further verification or quality-control review.
So don’t panic.
Follow the instructions given to you by the NBI personnel.
Step 13: Receive Your NBI Clearance
If your application is cleared, proceed to the releasing or printing section.
Check the printed document before leaving.
Verify:
- Your full name
- Personal information
- Clearance details
- QR/security information, where applicable
- Issue and validity details shown on your clearance
Keep the original in a safe place.
If you’re submitting it to an employer, it’s also useful to keep a scanned or photographed copy for your personal records.
How Long Does It Take to Get NBI Clearance?
There’s no single answer because processing depends largely on whether you get a hit.
If you have no hit
The actual biometric and printing stages can be very fast once you’re being processed. The NBI Citizen’s Charter allocates only a short processing time to biometrics and printing themselves.
Of course, this doesn’t include:
- Waiting in line
- Travel time
- Crowd volume
- System delays
If you have a hit
Your clearance may take longer because manual verification is required.
The NBI’s current guidance says an applicant with a hit is generally instructed to return after around five to ten working days, depending on the verification required.
That’s why I recommend getting your NBI Clearance before an employer’s deadline, not the day before.
Can You Walk In Without an Online NBI Appointment?
The NBI strongly encourages applicants to complete the online process first.
Its official clearance-office locator specifically tells applicants to apply and pay online through the official portal before going to an NBI clearance office.
There are some special provisions for first-time jobseekers who need assistance registering, but for an ordinary applicant, the safest approach is:
Register online → book appointment → pay → visit branch.
Don’t assume you’ll simply be accommodated as a regular walk-in.
What Should You Wear to an NBI Clearance Appointment?
Remember that the NBI will take your photograph.
The current NBI application guide says branches enforce a dress code and advises applicants to avoid attire such as:
- Sandos
- Tank tops
- Shorts
- Slippers
Smart casual clothing or a collared shirt is recommended.
You don’t need to wear a suit.
Just dress appropriately for a government office and remember that the photograph will form part of your clearance record.
How to Renew NBI Clearance in 2026
Here’s where things have become more interesting.
There are now convenient renewal options for qualified applicants, including the traditional online-renewal system and the newly launched NBI eClearance through eGovPH.
Option 1: NBI Clearance Online Renewal
The NBI’s current application guide says applicants who previously had an NBI Clearance issued from 2014 onward and whose important personal information hasn’t changed may be able to use the online-renewal option instead of returning to a branch.
For qualified applicants, this can allow you to complete the renewal online and arrange delivery instead of repeating a regular branch appointment.
Eligibility can depend on your existing NBI record.
If the system doesn’t allow you to use the renewal service, you’ll need to follow the regular application and branch-processing procedure.
Option 2: Renew NBI Clearance Through eGovPH
This is one of the biggest NBI Clearance developments of 2026.
On July 6, 2026, the NBI and Department of Information and Communications Technology officially launched NBI eClearance on the eGovPH Super App.
According to the NBI, verified eGovPH users can access NBI Clearance services through the platform, including the ability to:
- Retrieve clearance information
- Renew an eligible NBI Clearance
- Access a digital copy
Eligible users may reportedly complete the renewal process in as little as five minutes.
This can be a huge time-saver if you’re eligible.
Can First-Time Applicants Use eGovPH Instead of Going to NBI?
Don’t confuse renewal with a first-time application.
The July 2026 NBI announcement specifically describes the eGovPH integration as providing a faster digital renewal process for eligible users.
If you’re applying for your first regular NBI Clearance, you should still expect to complete the standard process that includes biometric capture, photograph, fingerprinting, and signature at an NBI clearance center.
So think of it this way:
New applicant
Online application
→ appointment
→ payment
→ NBI branch
→ biometrics
→ verification
→ clearance
Eligible renewal applicant
You may be able to use an online renewal option or NBI eClearance through eGovPH, depending on your eligibility.
NBI Clearance Renewal Through eGovPH: Why It Matters
This isn’t just another cosmetic update.
Previously, people often associated government clearances with repeated visits to physical offices.
The NBI says the eGovPH integration allows verified users to retrieve, renew, and access a digital copy of their clearance through a secure government platform.
For someone who regularly needs updated clearances for employment or other transactions, that’s a meaningful improvement.
Just remember that eligibility matters.
If the service isn’t available to you inside eGovPH, use the regular NBI process rather than trying to find an unofficial workaround.
First-Time Jobseeker NBI Clearance: Step-by-Step
If this is your first job, your application is slightly different.
Step 1: Get a Barangay Certification
You need a Barangay Certification showing that you’re a qualified first-time jobseeker.
RA 11261 requires this certification as proof of eligibility for the fee exemption.
Step 2: Use the First-Time Jobseekers NBI Process
The NBI has a dedicated online portal for qualified first-time jobseekers. Its current application guide explicitly tells eligible applicants to use that special portal rather than the ordinary registration page.
Step 3: Bring Two Valid IDs
The NBI Citizen’s Charter requires a Barangay Certification and two valid government-issued IDs or acceptable certificates for first-time jobseeker processing.
Step 4: Go to the First-Time Jobseeker Lane
At the NBI branch, proceed to the designated First-Time Jobseeker processing area where available.
The NBI will capture your:
- Photograph
- Fingerprints
- Signature
There is no NBI Clearance fee for a qualified applicant using the program.
Step 5: Wait for Verification
Like any other applicant, you’ll either receive a no-hit result or your record will require additional verification.
If there’s no hit, the clearance can proceed to printing.
If there’s a hit, you’ll be given instructions on when to return or whether further quality-control verification is needed.
NBI Clearance vs. Police Clearance
People sometimes use the terms as though they’re interchangeable, but they’re different documents.
NBI Clearance
Issued through the:
National Bureau of Investigation
National Police Clearance
Issued through the:
Philippine National Police
Both involve background-record verification, but they are separate government documents issued through different systems.
The practical rule is easy:
Get whichever clearance your employer or requesting organization specifically requires.
If an employer asks for an NBI Clearance, don’t assume a Police Clearance will automatically be accepted in its place.
NBI Clearance for Applicants Abroad
Filipinos overseas also have a separate process.
The NBI provides a Mailed Clearance procedure for applicants abroad. According to the NBI, overseas applications are processed through its clearance operations in Manila, and renewals of certificates issued from 2014 onward may be processed through the applicable mailed-clearance procedure or a designated representative.
If you’re currently overseas, don’t follow the ordinary Philippines appointment process blindly.
Use the NBI’s specific instructions for applicants abroad.
Tips for a Smooth NBI Clearance Application
Here are a few practical things that can save you time.
1. Apply only through the official NBI system
Start from the National Bureau of Investigation’s official website and follow its link to the Clearance Application Portal.
Don’t provide sensitive personal information to a website merely because “NBI Clearance” appears in its domain name.
2. Check your information before saving
Make sure your name matches your valid IDs.
Pay particular attention to:
- Middle names
- Hyphenated surnames
- Suffixes
- Birth dates
Government forms are not the place for “close enough.”
3. Save your reference number
Screenshot it immediately.
You’ll need it for payment and branch processing.
4. Check that your transaction says PAID
Don’t assume that completing a GCash or banking transaction automatically means the NBI portal immediately recognized your payment.
Check your transaction status.
5. Bring two valid IDs
The current NBI guidance requires two valid government-issued IDs for regular branch processing.
If possible, bring an extra one.
6. Don’t apply at the last minute
A hit can delay release while your identity is verified.
If an employer gives you two weeks to complete your pre-employment documents, don’t wait until Day 13 to apply.
7. Use the renewal option if you’re eligible
If you’ve had an NBI Clearance before, check whether you qualify for online renewal or the new eGovPH eClearance process before booking another physical branch visit.
You might save yourself a trip.
Frequently Asked Questions About NBI Clearance
How much is NBI Clearance in 2026?
The current basic NBI Clearance fee is ₱130, plus the applicable electronic-payment service charge, which the NBI says is generally around ₱25–₱30.
How many valid IDs do I need?
The NBI’s current application guide instructs applicants to bring two original, valid government-issued IDs for regular branch processing.
Is NBI Clearance free for first-time jobseekers?
Yes, qualified first-time jobseekers can obtain an NBI Clearance without paying the normal government fee under RA 11261. They must comply with the eligibility requirements, including the required Barangay Certification.
Can I get NBI Clearance completely online?
For most new applicants, no.
You can register, schedule, and pay online, but the standard procedure includes physical biometric, photo, fingerprint, and signature capture at an NBI branch.
Eligible renewal applicants may have online options, including the new NBI eClearance service through eGovPH.
Can I renew NBI Clearance through eGovPH?
Yes, for eligible users.
The NBI officially launched eClearance on the eGovPH Super App on July 6, 2026. Eligible users can renew and access a digital copy through the platform, with the NBI saying some renewals can be completed in as little as five minutes.
What happens if I get a hit?
Your application requires additional verification.
The NBI says applicants with hits may be asked to return after a specified period—typically around five to ten working days—while their identities and records are reviewed.
A hit does not automatically mean that you have a criminal record.
Can I still go if I missed my appointment?
The NBI’s current application guide says a 15-day grace period generally applies once a transaction has been marked PAID, allowing applicants to visit their selected branch within that period if they missed the original target date.
I’d still go on your scheduled date whenever possible.
Can I walk in to an NBI branch?
For an ordinary application, complete your application and payment online first. The NBI’s clearance-office locator specifically advises applicants to apply and pay through the official portal before visiting a clearance office.
Can I use my National ID?
The NBI’s current application guide lists the National ID among examples of government-issued identification applicants can present.
Remember that regular applicants should prepare two valid IDs.
Can someone else claim my NBI Clearance?
Regular new applications include personal biometric processing, so applicants should expect to appear personally for that part of the process.
Separate procedures exist for certain applicants abroad and renewals.
Quick NBI Clearance Checklist
Before your appointment, make sure you have:
- Online application completed
- Appointment selected
- Transaction marked PAID
- Reference number saved
- Payment receipt or confirmation
- Two valid government-issued IDs
- Appropriate clothing for your NBI photo
For qualified first-time jobseekers, also prepare your required Barangay Certification and follow the special first-time jobseeker procedure.
Final Thoughts
Getting an NBI Clearance in 2026 isn’t particularly difficult once you know the process.
For most new applicants, it goes like this:
Register online → complete your profile → choose an NBI branch → schedule an appointment → pay → go to the branch → biometrics → verification → receive your clearance.
The basic clearance fee is currently ₱130 plus the applicable payment service charge, while qualified first-time jobseekers can get their clearance free under the First Time Jobseekers Assistance Act.
The biggest improvement in 2026 is renewal.
With the launch of NBI eClearance on eGovPH on July 6, 2026, eligible users can now retrieve, renew, and access a digital NBI Clearance using the government’s super app, with some renewals taking as little as five minutes.
So before automatically scheduling another trip to an NBI office, check whether you’re eligible for renewal online.
But if you’re a first-time applicant, don’t worry—the regular process is already much simpler than the old system. Complete everything online first, bring the correct IDs, save your reference number, and give yourself enough time in case your application needs additional verification.
A little preparation can turn what sounds like a complicated government transaction into a fairly straightforward one.