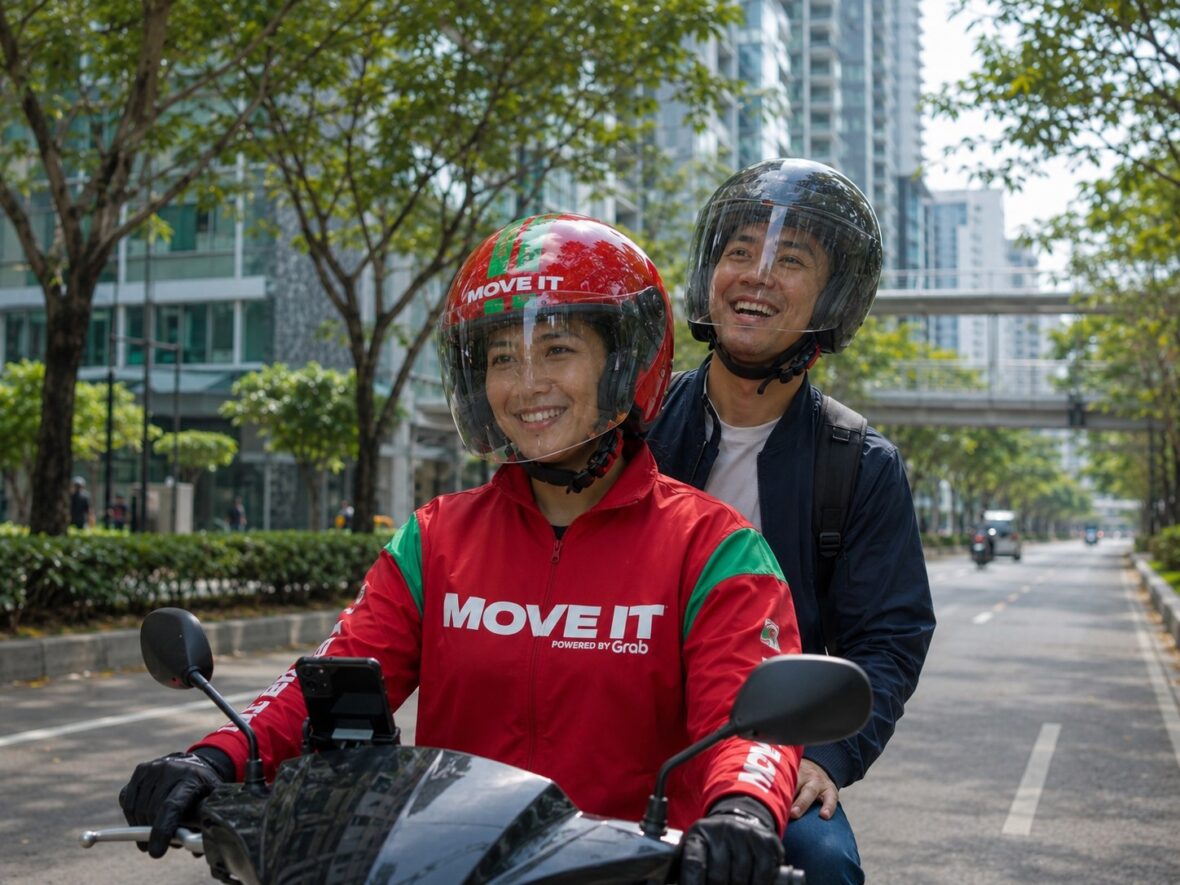
Getting stuck in traffic is never fun, especially when you are already running late for work, school, an appointment, or an important meeting.
Sometimes, booking a car does not solve the problem because you may still spend a long time sitting in traffic. This is why motorcycle taxi apps such as Move It have become a practical option for many Filipino commuters.
With a few taps on your phone, you can enter your pickup point, select your destination, check the fare, and request a motorcycle rider. The process is fairly simple, but first-time users may still have questions.
Where should you place the pickup pin? How do you apply a promo code? What should you check before getting on the motorcycle? What happens when your rider cancels or your cashless payment is placed on hold?
This complete guide explains how to book a Move It ride from start to finish, along with practical tips that can help you avoid common booking problems.
Content
What is Move It?
Move It is a motorcycle taxi and ride-hailing app operating in the Philippines. It connects passengers with registered motorcycle rider-partners who can take them from their selected pickup point to their destination.
The official Move It booking guide explains that passengers can download the app, register using their contact information, select Moto-Taxi, and enter their pickup and drop-off addresses.
Move It is commonly used for:
- Daily commutes to work or school
- Short trips around the city
- Travel to shopping malls
- Connections to MRT, LRT, bus, and jeepney terminals
- Appointments and errands
- Rush-hour journeys
- Trips where booking a car may take too long
The Move It app is available for Android and Apple devices. Its current app listing includes features such as card payments, real-time ride tracking, trip sharing, protected in-app calls, detailed receipts, emergency contacts, and post-ride ratings.
What you need before booking Move It
Before opening the app, prepare the following:
- A compatible smartphone
- An active mobile number
- A working email address
- Mobile data or a reliable internet connection
- Location or GPS access
- An accepted payment method
- Enough phone battery for the entire journey
Your mobile number is important because it is used to verify your account. Your rider may also need to contact you when locating the pickup point.
Keep your mobile data and location services turned on until the ride has been completed. The app uses your location to identify pickup points, match you with a nearby rider, track the motorcycle, and display your journey.
It is also a good idea to charge your phone before travelling. You do not want your battery to run out while waiting for your rider or during an ongoing trip.
How to download the Move It app
Move It has separate applications for passengers and rider-partners, so make sure you download the correct one.
For passengers, look for the official app currently titled Move It: Book a Moto Taxi or Move It Now – Book Moto Taxi, depending on the app store and device.
You can download it from:
- Google Play Store for Android
- Apple App Store for iPhone
Check that the app is published by the official Move It operator. On Apple’s Philippine App Store, the listed developer is We-Load Transcargo Corporation.
Avoid downloading unofficial application files from random websites. Using the official app store version helps reduce the risk of installing an outdated, modified, or potentially harmful application.
How to create a Move It account
After installing the app, open it and begin the registration process.
Move It’s official guide says users must provide a valid phone number, email address, and other basic personal information.
The exact screens may change whenever the app is updated, but the registration process generally involves the following steps:
- Open the Move It passenger app.
- Enter your active mobile number.
- Wait for the verification code.
- Enter the code in the app.
- Provide your name and email address.
- Review the requested account information.
- Accept the applicable terms and privacy notices.
- Complete your registration.
Use your real and current information. Incorrect account details may create problems when requesting support, applying for passenger discounts, reporting a lost item, or recovering your account.
Move It’s terms also state that users should keep their login information secure and should not allow another person to assume their identity or user status.
Never share your password or verification code with someone claiming that they need it to activate a ride, refund a payment, or issue a voucher.
How to book a Move It ride
Once your account is ready, you can request your first Moto-Taxi ride.
The app’s interface may change slightly over time, but the basic booking process remains the same.
Step 1: Open the Move It app
Turn on your mobile data and location services before launching the app.
Allow Move It to access your location while you are using it. The app needs this information to identify your approximate pickup point and search for nearby riders.
Wait for the map to load properly before entering your destination.
When the map does not load:
- Check your internet connection.
- Turn your location services off and on.
- Close and reopen the app.
- Move to an area with a stronger mobile signal.
- Check whether a Move It update is available.
Step 2: Select Moto-Taxi
From the home screen, select the Moto-Taxi service.
Move It may display other services or transport-related features inside the app. Make sure you select the passenger motorcycle taxi option rather than a parcel-delivery service.
Moto-Taxi is for transporting one passenger. Move It’s current terms state that only one passenger is permitted per booking.
Do not attempt to ride with a second adult or child on the same booking.
Step 3: Enter your pickup point
The app may automatically detect your approximate location, but the suggested pickup point is not always perfect.
Look carefully at the map and move the pin when necessary.
Your pickup point should be:
- Accessible to motorcycles
- Located on the correct side of the road
- Away from prohibited stopping areas
- Easy for the rider to find
- Safe for you to wait
- Specific enough to avoid confusion
For example, entering only the name of a large shopping mall may not be enough. The mall may have several entrances located on different streets.
Instead, use a more specific location such as:
- Main entrance near the supermarket
- Transport terminal entrance
- Gate beside the pharmacy
- Pickup bay near the department store
- Building lobby facing a particular road
- Designated motorcycle taxi booth
Check the side of the road
This small detail can make a big difference.
Suppose you are standing across a six-lane road from the pin. The rider may need to make a long U-turn or travel around an entire block to reach you.
Before confirming, zoom in and check whether the pin is placed on the same side of the road where you are waiting.
Avoid difficult pickup locations
Try not to place your pin:
- In the middle of a building
- Inside a private property the rider cannot enter
- On an expressway
- At a no-stopping zone
- At a crowded intersection
- On a pedestrian-only walkway
- Behind a locked subdivision gate
- Inside an airport or terminal area where motorcycles are restricted
When necessary, walk to a nearby legal and accessible pickup area.
Add a clear pickup note
Use the note or chat feature to provide a simple landmark.
A useful message would be:
I’m waiting outside the main entrance beside the convenience store. I’m wearing a blue shirt.
Avoid sending an unnecessarily long explanation. Riders need directions they can read quickly and safely.
Step 4: Enter your destination
Type the name or address of the place you want to visit.
The app may show several places with similar names, so check:
- The city or municipality
- The street
- The branch name
- Nearby landmarks
- The destination pin on the map
For example, a restaurant or bank may have several branches in Metro Manila. Choosing the wrong branch can produce an incorrect route and fare.
Do not confirm until the map shows the correct location.
Move It’s official instructions specifically remind passengers to make sure both the pickup and drop-off pins are correct.
Step 5: Review the route and estimated fare
After entering your destination, the app will calculate the ride and display the fare before you book.
Review the following information:
- Pickup point
- Destination
- Estimated route
- Displayed fare
- Available promotions
- Selected payment method
Do not focus only on the fare. A wrong pickup or destination pin can cause a cheaper-looking price that does not represent your actual trip.
Move It says passengers are generally required to pay the fixed fare reflected in the app, plus applicable toll fees when relevant. A rider should not demand an unrelated additional fare.
Step 6: Apply a Move It promo code or voucher
Before confirming the booking, check whether you have an available discount.
Look for an option labelled Offers, Promos, or Vouchers, depending on the current version of the app.
You may see:
- New-user vouchers
- Account-specific discounts
- Partner promotions
- Route-based offers
- Student, senior citizen, or PWD discounts
- Holiday or payday deals
- Limited-use promotional codes
Select the voucher and check whether the discounted amount appears in the fare breakdown.
Do not assume the promotion has been applied just because you entered a code. Look at the final fare before proceeding.
A promo may fail when:
- It has expired.
- It is limited to another city.
- The redemption quota has been reached.
- Your fare is below the minimum amount.
- You selected an ineligible payment method.
- The offer is for another service.
- Your account is not included in the campaign.
- You already used the maximum number of redemptions.
Step 7: Choose your payment method
Select one of the payment methods currently available in your Move It account.
The options shown may differ depending on your device, account, location, and app version.
Move It’s current Apple App Store listing confirms that the app supports in-app credit-card payments.
Your available choices may include:
- Cash
- Credit or debit card
- An eligible electronic wallet
- Other cashless payment methods displayed in the app
Paying with cash
For a cash booking, pay the amount shown in the app after completing the ride.
Bring smaller bills when possible. The rider may not always have enough change for a ₱500 or ₱1,000 note.
Before getting off the motorcycle:
- Check the final fare.
- Give the correct cash amount.
- Count your change.
- Confirm that the trip has been completed in the app.
Paying cashless
When using a card or eligible electronic wallet, make sure:
- The account has sufficient funds.
- The card has not expired.
- The correct payment method is selected.
- Your internet connection remains active.
- You recognise the displayed fare.
Move It may place a temporary authorisation hold on your cashless payment method when you request a booking. This is used to check whether the required amount is available and is not necessarily the final completed charge.
When a cashless booking is cancelled or remains unallocated, Move It says it releases the held amount, although the exact time for the balance to reappear can also depend on the issuing bank or payment provider.
Step 8: Confirm your booking
After checking the details, tap the booking or confirmation button.
The app will search for an available Move It rider near your location.
Matching time can depend on:
- Time of day
- Passenger demand
- Weather
- Number of online riders
- Your pickup point
- Distance from active rider areas
- Road closures and traffic restrictions
You may be matched quickly in a busy commercial area but wait longer in a location far from major roads.
Keep the app open while it searches.
Avoid booking through several motorcycle taxi apps at the same time unless you cancel the extra requests immediately. Making several riders travel toward you and accepting only one wastes their time.
Step 9: Check your matched rider’s information
Once a rider accepts, the app should display details such as:
- Rider’s name
- Profile photograph
- Motorcycle information
- Plate number
- Rider rating
- Estimated arrival time
Move It says passengers can see the rider’s name, photo, rating, and plate number after being matched.
Review these details before the rider arrives.
You may also be able to follow the rider’s location on the map in real time. The current app listing advertises real-time tracking, protected in-app calls, and trip-sharing features.
Step 10: Communicate with the rider
The rider may call or send a message to confirm your location.
Reply promptly, especially when you are inside a large mall, office complex, subdivision, or transport terminal.
Keep your message short and practical:
I’m outside Gate 2 near the pedestrian crossing.
or:
I’m beside the coffee shop, wearing a white jacket.
Avoid giving personal information that is not necessary for the pickup.
Move It’s safety advice recommends using in-app communication and avoiding the unnecessary sharing of personal details.
Do not expect the rider to read a long message while operating the motorcycle. Send the landmark while the rider is still approaching.
Step 11: Be ready at the pickup point
Once a rider accepts your booking, prepare to leave.
Before the rider arrives:
- Pack your belongings.
- Secure loose straps.
- Put your phone somewhere accessible.
- Check your payment method.
- Move to the agreed pickup area.
- Watch the rider’s location on the map.
- Keep your phone’s volume turned on.
Waiting until the rider has arrived before leaving a building may cause unnecessary delays. In crowded places, the rider may not be allowed to remain at the pickup point for long.
However, do not wait in an unsafe road position. Choose a legal, well-lit, and accessible area.
Move It recommends selecting populated and well-lit pickup and drop-off points, especially at night.
Step 12: Verify the rider and motorcycle
This is one of the most important parts of the booking process.
Before getting on the motorcycle, compare the arriving rider with the details displayed in your app.
Check:
- Rider’s face
- Rider’s name
- Motorcycle model or description
- Plate number
- Move It identification
- Booking information
Do not ride when:
- The rider does not match the profile.
- The motorcycle is completely different.
- The plate number does not match.
- Someone claims to be substituting for the registered rider.
- The rider asks you to cancel the booking and continue privately.
- The motorcycle appears unsafe or seriously damaged.
- You feel uncomfortable for any reason.
Move It’s official safety guidance specifically tells passengers to verify the rider, motorcycle model, and plate number against the booking information before the trip.
When something does not match, stay in a safe place and report the issue through the app.
Step 13: Put on the passenger helmet
The rider should provide the required passenger safety gear.
Before leaving:
- Put on the hair cap when provided.
- Wear the helmet correctly.
- Fasten the helmet strap.
- Check that the helmet is secure.
- Make sure your clothing and belongings are not loose.
Do not simply place the helmet on top of your head without fastening it.
Move It advises passengers to wear the provided gear properly, avoid loose clothing and slippers, and ensure that the helmet is locked.
Wear practical clothing whenever possible. Trousers or jeans and closed shoes are generally more suitable for motorcycle travel than loose garments and unsecured slippers.
Step 14: Get on the motorcycle safely
Wait until the rider has stopped completely and signals that it is safe to board.
Move It advises passengers to get off on the left side of the motorcycle to help avoid burns from the muffler, which is commonly located on the right.
The same general caution is helpful when getting on.
Once seated:
- Place both feet on the passenger foot pegs.
- Maintain a balanced position.
- Hold the designated grab bar or follow the rider’s safe instructions.
- Avoid leaning heavily on the motorcycle’s top box.
- Keep bags secured.
- Do not make sudden movements.
Tell the rider when you are ready before the motorcycle starts moving.
Step 15: Use the safety features during the trip
Move It provides several in-app tools intended to support passenger safety.
These include:
- Real-time tracking
- Share Your Trip
- Protected in-app calls
- Emergency contacts
- An enhanced Safety Centre
- An emergency button
The app’s official listing describes these features, while Move It’s safety materials state that passengers can share trip details with family or friends and use an emergency function when assistance is needed.
Consider sharing the trip when:
- Travelling alone
- Riding at night
- Visiting an unfamiliar location
- Taking a longer journey
- Being picked up from a quiet area
Keep an eye on the route, but avoid holding or using your phone unnecessarily while the motorcycle is moving.
Move It’s published safety reminders tell passengers to remain alert, monitor the route, and avoid using their phones during the ride.
Step 16: Speak up when you feel unsafe
You do not have to remain silent when the rider is going too fast or driving in a way that makes you uncomfortable.
Politely say:
Kuya, puwede pong bagalan nang kaunti?
You can also ask to be dropped off at a safe location when continuing the ride feels dangerous.
Report serious concerns such as:
- Reckless driving
- Excessive speeding
- Harassment
- Threats
- Suspicious route changes
- Plate-number mismatch
- Attempts to move the ride outside the app
- Demands for an unauthorised additional fare
Move It says passengers can submit feedback after a ride, and its safety rules provide penalties for reckless driving, harassment, fare manipulation, and other violations.
Step 17: Arrive and complete the payment
Once you reach your destination, wait for the motorcycle to stop completely before getting off.
Check your surroundings and alight carefully, preferably away from moving traffic.
For a cash ride:
- Check the final amount in the app.
- Pay the rider.
- Receive the correct change.
- Confirm that the booking is completed.
For a cashless ride:
- Check the completed fare.
- Confirm the payment notification.
- Review the receipt.
- Report an incorrect charge when necessary.
Passengers should pay the fare shown in the app, plus any legitimate toll charges that apply. Overcharging is treated as a serious violation under Move It’s published guidance.
Do not pay a second time in cash when the cashless transaction was successfully completed.
Step 18: Check your belongings
Before walking away, make sure you still have:
- Mobile phone
- Wallet
- Keys
- Identification cards
- Bags
- Earphones
- Umbrella
- Work or school items
Small objects can easily fall from a pocket or remain near the motorcycle’s seat.
It is easier to recover something while the rider is still nearby than after the rider has accepted another passenger.
Step 19: Rate the rider and leave feedback
After the trip, the app may ask you to rate the rider.
Give an honest rating based on:
- Driving behaviour
- Professionalism
- Pickup experience
- Communication
- Safety
- Condition of the helmet
- Accuracy of the trip
Move It’s app includes a rating and post-ride feedback system, and the company says it reviews rider ratings and passenger feedback.
When the issue is serious, do not rely only on a low rating. Submit a formal report through the Help Centre and include the booking information.

How to get a Move It rider faster
There is no guaranteed way to receive an immediate match, but these tips can improve your chances.
Use a visible pickup point
Choose a main road, recognised entrance, or designated pickup area rather than an obscure side street.
Place the pin correctly
An incorrect pin may discourage riders from accepting or may cause them to cancel after discovering your actual location.
Avoid restricted areas
Riders may have difficulty collecting passengers at no-stopping zones, private roads, terminals, and streets with heavy enforcement.
Book before you are already late
Motorcycle taxi availability changes throughout the day. Give yourself extra time during rush hour, rainy weather, and large events.
Keep your phone available
A rider may cancel when unable to contact or locate you.
Respond quickly
Answer calls or messages as soon as possible while staying alert for scams. A legitimate rider should not ask for your password or verification code.
Walk to a practical pickup point
When safe, moving a short distance to a main entrance or accessible street can be faster than asking the rider to enter a complicated location.
What to do when no Move It rider accepts
When the app cannot find a rider:
- Wait a few minutes.
- Check whether your pickup pin is accessible.
- Move the pin to a nearby main road.
- Confirm that the destination is within the service area.
- Close and reopen the app.
- Check your internet connection.
- Try booking again.
- Consider another transport option when the wait becomes too long.
Avoid repeatedly making and cancelling requests within a very short period.
Rider availability is not guaranteed, particularly during:
- Morning and evening rush hours
- Heavy rain
- Major events
- Late-night periods
- Transport disruptions
- High-demand holidays
What to do when your rider cancels
A rider may cancel because of traffic, an inaccessible pickup point, difficulty contacting you, a vehicle problem, or another operational reason.
When your rider cancels:
- Check whether the app is automatically finding another rider.
- Verify that the pickup pin is correct.
- Check whether your voucher has returned.
- Review any cashless payment hold.
- Request another ride.
When you were not picked up but the booking appears completed, open Activity, choose the affected trip, and report the issue through the Help Centre. Move It’s support instructions direct passengers to locate the booking through the Activity section.
How to cancel a Move It booking
Passengers can generally cancel before the ride begins.
Move It’s terms state that a passenger may cancel a request at any time before starting the ride with the matched rider, subject to applicable Move It policies.
Cancel as early as possible when:
- You entered the wrong destination.
- You selected the wrong pickup point.
- You accidentally made a duplicate booking.
- Your travel plans changed.
- You no longer need the ride.
Avoid waiting until the rider has already arrived unless there is a valid safety or booking problem.
When the rider or motorcycle does not match the app, prioritise safety. Cancel and report the mismatch rather than continuing the trip.
What to do when the rider asks you to cancel
A rider may occasionally ask you to cancel because they cannot reach the pickup point or cannot complete the trip.
Ask for the reason before taking action.
Never agree to cancel the app booking and then continue the same journey privately. An off-app ride may not have the same electronic record, real-time tracking, support access, or platform protections.
Keep the entire trip inside the official Move It system.
What to do when you are overcharged
Check the completed fare and compare it with the amount collected.
Move It says passengers are responsible for the fixed fare shown in the app and any applicable toll fees. Collecting a fare inconsistent with the app is prohibited under its rider guidelines.
When you believe you were overcharged:
- Save a screenshot of the fare.
- Keep the digital receipt.
- Record how much you paid.
- Open the completed trip in Activity.
- Select the payment or fare concern.
- Submit a clear report.
Explain whether the issue involved:
- Incorrect cash collection
- Missing change
- An additional cash demand
- An incorrect cashless charge
- A toll that was not actually used
- A rider asking for payment despite a completed cashless transaction
Common booking mistakes to avoid
Confirming the wrong destination
Always check the city and branch before booking.
Placing the pin across the road
A small pin error can require a long detour.
Booking before you are ready
Prepare your belongings before requesting a rider.
Ignoring calls and messages
The rider may be unable to find you.
Using an expired promo
Check the voucher’s validity and conditions.
Selecting the wrong payment method
Verify whether your booking is cash or cashless.
Getting on without checking the plate
Never skip the identity and vehicle check.
Riding without fastening the helmet
A loose helmet cannot provide its intended protection.
Continuing outside the app
Do not cancel and convert the booking into an informal ride.
Carrying oversized luggage
A motorcycle taxi is not suitable for a large suitcase or items that prevent you from sitting and balancing safely.
Frequently asked questions
Do I need an account to book Move It?
Yes. The official booking process requires passengers to download the app and register using a valid phone number, email address, and basic personal information.
Can I book Move It without internet?
You need an internet connection to request a rider, view the map, receive booking updates, communicate through the app, and use trip-tracking features.
How many passengers are allowed?
Only one passenger is allowed per Moto-Taxi booking under Move It’s terms.
Can I book when carrying luggage?
A small, secure bag may be manageable. Avoid booking a motorcycle taxi when carrying a suitcase, heavy equipment, fragile items, or anything that affects your ability to sit and balance properly.
Does Move It accept credit cards?
Yes. Move It’s current app listing includes in-app credit-card payment. Availability and setup requirements may depend on your account and app version.
Why was an amount deducted before the ride was completed?
Move It may place a temporary authorisation hold when a cashless payment method is used. The hold checks whether sufficient funds are available and is separate from the final completed payment.
What happens to the payment hold when the booking is cancelled?
Move It says the held amount is released when a booking is cancelled or unallocated. The time it takes to reflect in your available balance may depend on your bank or payment provider.
What should I do when the plate number does not match?
Do not get on the motorcycle. Stay in a safe place, cancel when necessary, and report the mismatch through Move It’s official support process.
Can the rider ask for more than the displayed fare?
Passengers are generally required to pay the fare shown in the app plus legitimate toll charges. An unauthorised additional collection should be reported.
Should I tip my Move It rider?
Tipping is optional. You may give a tip when you appreciate the service, but you should not feel pressured to pay more than the proper fare.
Can I send a package using a Moto-Taxi booking?
Use the designated delivery service shown in the app, such as Express Saver when available, instead of booking a passenger ride for an unaccompanied parcel.
Final thoughts
Booking a Move It ride is easy once you understand the process.
Download the official app, create your account, select Moto-Taxi, enter your pickup point and destination, review the fare, choose your payment method, and confirm the booking.
However, the most important parts happen after you tap Book.
Be ready at the pickup point. Answer the rider’s messages. Check the rider’s face, motorcycle, and plate number. Wear the helmet correctly, keep the trip inside the app, and speak up whenever you feel unsafe.
Move It can be a convenient way to travel through busy Philippine cities, especially when traffic is moving slowly and you only have a small bag with you. Using the app responsibly can make the entire experience smoother—not only for you, but also for the rider who accepts your booking.