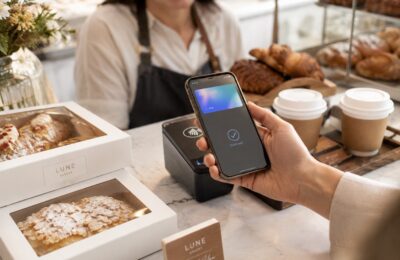
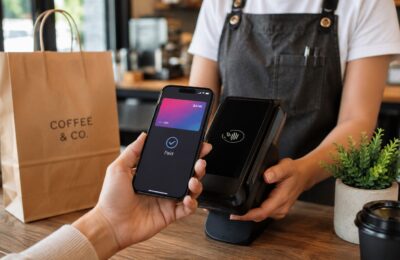
Apple Pay is now officially available in the Philippines, and setting it up is surprisingly straightforward—provided that your device, bank, and card are supported.
Apple launched the service locally on August 4, 2026, allowing eligible Filipino cardholders to add their debit or credit cards to Apple Wallet. Once your card has been verified, you can use your iPhone or Apple Watch to make contactless payments in stores. You can also use Apple Pay for purchases in participating apps and websites.
You do not need to download a separate Apple Pay application. The service is already integrated into the Wallet app found on compatible Apple devices.
However, there are a few things you need to prepare before tapping the Add Card button. Your exact card must be supported, your device must meet Apple’s requirements, and your bank may ask you to complete an additional verification process.
This guide will walk you through the entire setup—from checking your card’s eligibility to making your first payment.
Content
Apple Pay Philippines Setup at a Glance
Here is the basic process:
- Check whether your bank and card are supported.
- Update your Apple device.
- Sign in to your Apple Account.
- Turn on Face ID, Touch ID, or a device passcode.
- Open Apple Wallet.
- Tap the Add Card button.
- Scan, tap, or manually enter your card information.
- Complete your bank’s verification process.
- Wait for the card to be approved.
- Use your iPhone or Apple Watch at a compatible contactless terminal.
The actual card-adding process may take only a few minutes. Bank verification can take longer if the issuer needs additional information or asks you to contact customer service.
What You Need Before Setting Up Apple Pay
Before adding your card, check that you have all the basic requirements.
Apple says users need a compatible device with updated software, a supported card from a participating issuer, an Apple Account signed in on the device, and Face ID, Touch ID, or a passcode enabled. Two-factor authentication for the Apple Account may also be required.
1. A Compatible Apple Device
Apple Pay works on eligible:
- iPhone models
- Apple Watch models
- iPad models
- Mac computers
For the Philippine launch, Apple specifically listed:
- iPhone 6 or later with iOS 12.5.2 or later
- Apple Watch Series 4 or later with watchOS 9 or later
- Apple Watch paired with an iPhone 8 or later
Apple Pay can also be used on compatible iPads and Macs for purchases in apps and on the web.
Even when your device meets the minimum requirement, it is best to install the latest operating-system version available for it. This gives you the latest security updates and can prevent compatibility issues during setup.
2. A Supported Philippine Card
Having a Visa or Mastercard does not automatically mean your card will work with Apple Pay.
The bank must participate in Apple Pay, and the exact card network and product must also be supported.
As of August 5, 2026, Apple officially lists the following Philippine issuers and card types:
| Bank | Cards listed as supported |
|---|---|
| China Banking Corporation or Chinabank | Visa credit and debit cards; Mastercard credit cards |
| GoTyme Bank Corporation | Visa debit and credit cards |
| Metropolitan Bank and Trust Company or Metrobank | Visa credit cards; Mastercard credit and debit cards |
| Union Bank of the Philippines | Visa and Mastercard credit and debit cards |
Apple warns that some cards from participating banks may still be ineligible. The issuing bank has the final decision regarding individual card products.
For example, being a Metrobank customer does not necessarily mean every Metrobank card can be added. You still need to check the network and type of card you have.
3. An Apple Account
You must be signed in to your Apple Account on the device.
Your Apple Account is the account you use for services such as:
- iCloud
- The App Store
- Find My
- Apple Music
- Apple Wallet
You may be asked to sign in when adding your card.
Apple also says that signing out of iCloud or removing your device passcode will remove payment cards from that device.
4. Two-Factor Authentication
Two-factor authentication adds another layer of security to your Apple Account.
When enabled, signing in on a new device normally requires your password and a verification code sent to another trusted device or number.
Apple recommends checking that two-factor authentication is turned on when troubleshooting a card that cannot be added.
To review your Apple Account security settings on an iPhone:
- Open Settings.
- Tap your name.
- Select Sign-In & Security.
- Check whether two-factor authentication is enabled.
The wording may differ slightly depending on your iOS version.
5. Face ID, Touch ID, or a Passcode
Apple Pay requires a way to verify that you are the person authorizing the payment.
Depending on your device, this may include:
- Face ID
- Touch ID
- Your iPhone passcode
- Your Apple Watch passcode
You cannot normally use Apple Pay on a completely unsecured device.
To set an iPhone passcode:
- Open Settings.
- Select Face ID & Passcode or Touch ID & Passcode.
- Tap Turn Passcode On.
- Follow the instructions.
Apple Watch users must also have a passcode enabled on the watch.
6. Updated Contact Information with Your Bank
Your bank may send a one-time password or verification request to the mobile number or email address registered to your account.
Before adding your card, make sure your bank has your current:
- Mobile number
- Email address
- Residential address
- Other required account details
An outdated mobile number is a common reason customers cannot receive the verification code needed to activate a card.
How to Check Whether Your Card Is Eligible
There are several ways to check your card.
Check Apple’s Participating-Bank List
Start by checking whether your bank and card network appear on Apple’s official Philippine list.
Remember to look at the entire description—not just the bank’s name.
For instance, Apple currently lists Chinabank Visa credit and debit cards but only Mastercard credit cards. A Chinabank Mastercard debit card is not included in the published list as of August 5, 2026.
Check Your Bank’s App or Website
Open your bank’s official application or website and look for:
- Add to Apple Wallet
- Add to Apple Pay
- Apple Pay
- Digital wallet settings
- Card controls
Some issuers may allow cards to be added directly through their mobile banking application.
Try Adding the Card
You can also open Wallet and attempt to add the card.
If the card is unsupported, Wallet may display a message such as:
- Could Not Add Card
- Invalid Card
- Your Issuer Does Not Yet Offer Support
- Contact Your Card Issuer
Contact the Bank
The issuing bank is the best source for confirming whether a specific card product is eligible.
Apple does not approve or decline individual cards. The bank or card issuer makes that decision.
How to Update Your iPhone Before Setting Up Apple Pay
It is a good idea to update your iPhone before adding your card.
To check for an update:
- Connect your iPhone to Wi-Fi.
- Open Settings.
- Tap General.
- Select Software Update.
- Download and install any available update.
Make sure the phone has enough battery power or connect it to a charger during the update.
Apple specifically recommends using the latest available version of iOS when you are unable to add a card.
How to Set Up Apple Pay on an iPhone
The iPhone is likely to be the main device Filipinos use for Apple Pay.
Here is the complete process.
Step 1: Open the Wallet App
Look for the Wallet app on your iPhone.
Its icon resembles a wallet containing several cards. The app is already installed on compatible iPhones, so you do not need to download another app.
Be cautious of third-party apps pretending to be Apple Pay. Use the official Wallet app provided by Apple.
Step 2: Tap the Add Card Button
Inside Wallet, tap the plus sign or Add Card button.
You may be asked to sign in to your Apple Account before proceeding.
Depending on your device and account, you may see options such as:
- Debit or Credit Card
- Previous Cards
- Cards Found for You
- From Apps on Your iPhone
Apple allows eligible cards to be added directly through Wallet or through an issuer’s supported app.
Step 3: Select Debit or Credit Card
Choose Debit or Credit Card when adding a card you have not previously used with Apple Pay.
Tap Continue after reviewing the information displayed on the screen.
Step 4: Add Your Card Information
Apple provides several possible ways to add a card.
Tap or Hold the Card Near the iPhone
With an eligible chip card, you may be instructed to hold the card close to the iPhone.
The phone can read certain card information through the chip, making setup faster.
Scan the Card with the Camera
Position the card inside the frame shown on the screen.
The iPhone may automatically capture details such as:
- Cardholder name
- Card number
- Expiration date
Check the information carefully. You may still need to enter the card’s security code manually.
Enter the Card Details Manually
Tap Enter Card Details Manually when scanning or tapping does not work.
You will typically need to provide:
- The name printed on the card
- Card number
- Expiration date
- CVV or security code
Apple says the photo used when capturing card information is not saved to the device or stored in the photo library.
Step 5: Review the Card Details
Check that all the information is correct.
A single incorrect number, expiration date, or security code can cause the card to be rejected.
The name you enter should generally match the name recorded by your bank.
Step 6: Accept the Terms and Conditions
Your bank, card network, or Apple may display terms and conditions related to using the card through Apple Pay.
Read the terms before tapping Agree.
Adding the card does not create a new bank account or credit line. You are connecting your existing card to Apple Pay, and the original card agreement continues to apply.
Step 7: Complete Bank Verification
This is one of the most important steps.
Your bank may ask you to verify your identity through one or more of the following:
- A one-time password sent by SMS
- An email verification code
- Confirmation inside the banking app
- Security questions
- A customer-service phone call
- Additional personal information
- Downloading or opening the bank’s official app
Apple notes that some issuers require extra information or an app before approving a card.
Do not share your one-time password, card PIN, Apple Account password, or full security code with anyone who calls or messages you unexpectedly.
Step 8: Wait for the Card to Be Activated
After successful verification, the card should appear in Apple Wallet.
You may see a notification confirming that it is ready for Apple Pay.
Some cards may be activated immediately. Others may remain under review until the bank completes additional checks.
When the card is ready, you can use it at compatible merchants.
How to Add a Previously Used Card
When switching to a new iPhone or setting up Apple Pay again, Wallet may show cards you previously used.
To restore one:
- Open Wallet.
- Tap Add Card.
- Select Previous Cards or Cards Found for You.
- Choose the card.
- Tap Continue.
- Enter any requested security information.
- Complete verification with the issuer.
Previous cards are not always activated automatically. Your bank may require verification again because the new iPhone is treated as a different device.
How to Add a Card Through Your Bank’s App
Some banks provide an Add to Apple Wallet or Add to Apple Pay button in their official application.
The general process is:
- Open your bank’s official app.
- Sign in securely.
- Select the eligible card.
- Look for Add to Apple Wallet.
- Review the information.
- Agree to the terms.
- Complete any authentication requested by the bank.
- Follow the Apple Wallet instructions.
The exact steps vary by bank and card product.
During the Philippine launch, Apple also noted that eligible GoTyme debit cards could be accessed through the GoTyme Bank app. Selected UnionBank customers could apply for an eligible credit card through UnionBank’s website and add the issued card to Apple Pay.
Only use the bank’s official app or website. Do not follow card-activation links sent by unverified social-media accounts or random text messages.
How to Add a Virtual Card to Apple Pay
A physical plastic card is not always required.
An eligible virtual card may be added when the issuing bank supports Apple Pay.
After the virtual card is issued:
- Open the bank’s app or website.
- Select the virtual card.
- Tap Add to Apple Wallet, when available.
- Review the card information.
- Complete bank authentication.
- Confirm the card inside Wallet.
Apple said some eligible Philippine virtual cards could be issued and added to Apple Pay immediately, allowing customers to begin making payments without waiting for a physical card to arrive.
How to Set Up Apple Pay on Apple Watch
Adding a card to your iPhone does not necessarily activate it on your Apple Watch.
Each device receives separate payment information, so you may need to add and verify the card again for the watch.
Adding a Card Through the Apple Watch App
- Open the Apple Watch app on the paired iPhone.
- Tap My Watch.
- Select Wallet & Apple Pay.
- Tap Add Card.
- Select Debit or Credit Card to add a new card.
- Alternatively, tap Add beside a card already stored on the iPhone.
- Follow the onscreen instructions.
- Complete any verification requested by the bank.
Your issuer may require additional identity checks before the card becomes active on the watch.
Adding a Card Directly on Apple Watch
On supported software versions:
- Open the Wallet app on Apple Watch.
- Tap the More Options button.
- Tap Add Card.
- Select Debit or Credit Card.
- Follow the onscreen instructions.
Using the paired iPhone may still be easier when you need to enter card details or complete bank verification.
Make Sure the Watch Has a Passcode
Apple Pay requires a passcode on Apple Watch.
When the watch is on your wrist and unlocked, you can authorize a payment by double-clicking its side button. If the watch is removed from your wrist, it locks and requires the passcode again.
How to Set Up Apple Pay on an iPad
An iPad cannot normally be tapped against a payment terminal in a physical store. However, it can be used for Apple Pay purchases inside supported applications and websites.
To add a card:
- Open Settings.
- Select Wallet & Apple Pay.
- Tap Add Card.
- Follow the instructions.
- Verify the card with your bank.
The card must still be supported by a participating issuer.
How to Set Up Apple Pay on a Mac
On a Mac with built-in Touch ID:
- Open System Settings.
- Select Wallet & Apple Pay.
- Click Add Card.
- Enter or scan the requested information.
- Complete verification with the bank.
You can then use Apple Pay on participating websites and in supported apps.
Mac Without Touch ID
On a compatible Mac without built-in Touch ID, you may be able to authorize Apple Pay purchases using a nearby iPhone or Apple Watch.
On your iPhone:
- Open Settings.
- Tap Wallet & Apple Pay.
- Turn on Allow Payments on Mac.
The Mac, iPhone, or Apple Watch may need to be signed in to the same Apple Account and meet Apple’s continuity and security requirements.
How to Choose Your Default Apple Pay Card
When you have several cards in Wallet, one will be selected as the default.
This is the card that normally appears first when you double-click the iPhone’s side or Home button.
To change it on an iPhone:
- Open Settings.
- Select Wallet & Apple Pay.
- Tap Default Card.
- Select the card you want to use.
You can still choose another card before completing a purchase.
Choosing the right default card can help you maximize:
- Cashback
- Reward points
- Airline miles
- Dining benefits
- Grocery rewards
- Bank promotions
Always check the promotion’s terms because some offers may have special rules for digital-wallet transactions.
How to Change the Default Card on Apple Watch
You can change it through the watch itself:
- Open Wallet on Apple Watch.
- Tap the More Options button.
- Select Default Card.
- Choose your preferred card.
You can also change it through the Apple Watch app on the paired iPhone by going to My Watch, Wallet & Apple Pay, and then Default Card.
How to Make Your First Apple Pay Payment
Once the card shows that it is ready, you can test it at a merchant with a compatible contactless terminal.
Apple identified businesses such as Jollibee, Ayala Malls, WalterMart Supermarket, Power Mac Center, Rustan’s, Abenson, Beyond the Box, Shake Shack, and others as launch merchants. Acceptance may still vary by branch, terminal, and transaction.
Paying with Face ID
- Double-click the iPhone’s side button.
- Look at the iPhone to authenticate with Face ID.
- Select another card when necessary.
- Hold the top of the iPhone near the contactless reader.
- Wait for the checkmark and “Done” message.
Paying with Touch ID
- Double-click the Home button.
- Authenticate using Touch ID.
- Hold the iPhone near the terminal.
- Wait for confirmation.
Paying with Apple Watch
- Double-click the side button.
- Select the card.
- Hold the Apple Watch display near the reader.
- Wait for the tap, sound, or confirmation.
Apple says customers continue receiving the usual rewards and benefits offered by their eligible debit or credit cards when using Apple Pay.
Do You Need Mobile Data to Set Up Apple Pay?
You need an internet connection during setup because your device must communicate with Apple and your card issuer.
Internet access may be required for:
- Signing in to your Apple Account
- Checking card eligibility
- Receiving bank verification
- Opening the bank’s app
- Completing account authentication
- Downloading software updates
For the smoothest experience, connect to a secure and reliable Wi-Fi or mobile-data network.
Avoid adding a card while connected to an unfamiliar public Wi-Fi network, especially when you need to sign in to your bank.
Why Can’t I Add My Card to Apple Pay?
Card setup can fail for several reasons.
Your Bank Is Not Supported
As of August 5, 2026, Apple’s published Philippine list only includes Chinabank, GoTyme Bank, Metrobank, and UnionBank.
Your Exact Card Is Ineligible
A participating bank may support selected card networks and products—not its entire card portfolio.
The Card Information Is Incorrect
Double-check the:
- Card number
- Expiration date
- Security code
- Cardholder name
- Billing address
The Card Is Locked
A card temporarily locked through the bank’s app may not be approved.
The Card Is Expired or Replaced
An expired, cancelled, or replaced card cannot usually be activated.
Your Device Needs an Update
Update iOS, iPadOS, watchOS, or macOS to the latest available version.
Your Apple Account Is Not Properly Configured
Check that:
- You are signed in
- Two-factor authentication is enabled
- Face ID, Touch ID, or a passcode is active
- The device is compatible
The Bank Needs More Information
Your issuer may require another verification step.
There Is a Service or Connection Problem
Apple recommends checking for service outages or connection issues when card setup fails.
You Have Reached the Card’s Device Limit
A bank may restrict how many devices can use the same card.
You may see a Card Device Limit error when the card is already connected to too many devices. Contact the issuer or remove it from an old device.
What Common Error Messages Mean
“Could Not Add Card”
The bank may have rejected the request, the card may be ineligible, or there may be a temporary connection problem.
“Invalid Card”
Check the card details and confirm that the card is active and supported.
“Card Device Limit”
The card may already be connected to the maximum number of devices permitted by the issuer.
“Issuer Does Not Yet Offer Support”
The bank or exact card product has not been enabled for Apple Pay.
“Contact Card Issuer”
The bank needs to handle the next step. Contact the number printed on the back of the physical card or use the bank’s official support channel.
Apple does not approve or decline cards for Apple Pay. Card approval is handled by the bank or issuer.
What to Do When the Verification Code Does Not Arrive
Try the following:
- Check your mobile signal.
- Wait a few minutes before requesting another code.
- Confirm that the bank has your current mobile number.
- Restart the banking app.
- Check whether the code was sent by email instead.
- Avoid requesting too many codes within a short period.
- Contact the bank through its official support channel.
Never give a verification code to someone claiming that they need it to activate Apple Pay for you.
A legitimate setup process asks you to enter the code directly into Wallet, the bank’s app, or another official verification screen.
What to Do If the Bank Asks You to Call
Some banks may require telephone verification.
Call the official customer-service number printed on the card or published in the bank’s verified app or website.
The representative may ask you to confirm basic identity and account information. However, you should never provide:
- Your Apple Account password
- Your complete online banking password
- Your card PIN
- A one-time password requested by an unsolicited caller
Once verification is complete, the representative may ask you to return to Wallet and finish activating the card.
How to Remove a Card from Apple Pay
On an iPhone:
- Open Wallet.
- Select the card.
- Tap the More or Card Details button.
- Scroll down.
- Tap Remove Card.
- Confirm the removal.
Removing the card from one device may not remove it from every other device. Check your Apple Watch, iPad, and Mac separately.
On Apple Watch:
- Open Wallet.
- Select the card.
- Scroll down.
- Tap Remove.
You can also remove it through the Apple Watch app on the paired iPhone.
How to Set Up Apple Pay on a New iPhone
When moving to a new iPhone, your payment cards may appear as previous cards during setup.
However, Apple Pay cards are not simply copied as fully active payment cards. You may need to add and verify each one again.
During the new iPhone setup:
- Sign in to your Apple Account.
- Set up Face ID or Touch ID.
- Create a device passcode.
- Open Wallet when prompted.
- Select your previous cards.
- Enter the requested security details.
- Complete bank verification for each card.
Apple provides an option to add previous cards during the setup of a new iPhone.
Afterward, check whether the card is still active on your old phone. Remove it if you no longer plan to use that device.
Is It Safe to Add a Card to Apple Wallet?
Apple Pay is designed so that the actual physical card number is not stored on the device or on Apple’s servers.
Instead, a unique Device Account Number is assigned, encrypted, and stored in the device’s Secure Element. When you pay, Apple Pay uses device-specific information rather than simply handing the merchant the number printed on your card.
Purchases also require authentication through Face ID, Touch ID, Apple Watch, or your passcode.
Still, you should follow basic security practices:
- Use a strong device passcode.
- Keep two-factor authentication enabled.
- Do not share verification codes.
- Do not add cards while someone is remotely controlling your screen.
- Install only official banking apps.
- Keep Find My enabled.
- Review your bank transactions regularly.
- Report an unfamiliar transaction immediately.
What Happens If Your iPhone Is Lost?
Use the Find My service to locate or mark the device as lost.
Apple says Find My can be used to lock the device or suspend its Apple Pay payment capability.
You can also contact your card issuer and ask it to suspend the Apple Pay token associated with the missing device.
The bank may be able to suspend the digital card without immediately cancelling the physical card, depending on the circumstances.
Can You Add the Same Card to More Than One Device?
Yes, an eligible card can generally be added to multiple supported Apple devices, subject to the issuing bank’s rules.
For example, the same card may be added to:
- Your iPhone
- Your Apple Watch
- Your iPad
- Your Mac
The card may need to be verified separately on each device. Each device also receives its own device-specific payment credentials.
A bank may impose a device limit, so contact the issuer if you receive a Card Device Limit error.
Can You Add More Than One Card?
Yes.
You can store several eligible cards in Apple Wallet and select which one to use for each transaction.
This is useful when you have:
- A debit card for regular spending
- A cashback card for groceries
- A rewards card for dining
- A travel card for overseas purchases
- A backup card
You can set one as the default while keeping the others available.

Apple Pay Setup Frequently Asked Questions
Is Apple Pay already available in the Philippines?
Yes. Apple Pay officially launched in the Philippines on August 4, 2026.
Do I need to download Apple Pay?
No. Apple Pay is integrated into Apple Wallet on compatible devices.
Which Philippine banks support Apple Pay?
As of August 5, 2026, Apple lists Chinabank, GoTyme Bank, Metrobank, and UnionBank, with support limited to specified Visa and Mastercard products.
Can I add a BDO card?
BDO is not included in Apple’s initial official list of participating Philippine issuers.
Can I add a BPI card?
BPI is also not included in the initial official list as of August 5, 2026.
Can I add a GCash or Maya Card?
GCash and Maya consumer cards are not listed among Apple’s initial supported Philippine cards. A card cannot be assumed eligible merely because it carries a Visa or Mastercard logo.
Can I add a virtual card?
Yes, provided the virtual card and issuing bank support Apple Pay. Apple specifically mentioned eligible virtual-card options involving GoTyme and UnionBank during the Philippine launch.
Does setting up Apple Pay cost anything?
Apple does not charge users an additional fee to set up or pay with Apple Pay. Your bank’s usual card fees and account terms still apply.
Why does my bank need to verify the card?
The verification helps the bank confirm that the person adding the card is the legitimate cardholder.
Can Apple approve my rejected card?
No. Apple states that card approval and rejection are handled by the bank or card issuer.
Do I need a physical card?
Not always. An eligible virtual card may be added when supported by the issuing bank.
Can I use Apple Pay immediately after setup?
You can begin using the card once Wallet confirms that it has been approved and is ready for Apple Pay.
Do I need to open the bank’s app every time I pay?
No. Once the card is activated, you can usually double-click the side or Home button, authenticate, and hold the iPhone or Apple Watch near a compatible terminal.
Helpful Setup Checklist
Before attempting to add your card, confirm the following:
- Your bank supports Apple Pay.
- Your exact card type and network are eligible.
- The card is active and not locked.
- Your iPhone or other Apple device is compatible.
- Your software is updated.
- You are signed in to your Apple Account.
- Two-factor authentication is enabled.
- Face ID, Touch ID, or a passcode is set.
- Your bank has your current mobile number.
- You have a stable internet connection.
- You are using the official Wallet and banking apps.
Completing this checklist first can prevent many common setup problems.
Final Thoughts
Setting up Apple Pay in the Philippines is generally simple. The most important part is making sure that your exact card—not just your bank—is supported.
Once you have confirmed your eligibility, open Apple Wallet, tap the Add Card button, provide your card details, and complete the bank’s verification process. You can then use the card through your iPhone or Apple Watch at compatible contactless terminals or during checkout in participating apps and websites.
The initial Philippine rollout is still limited to selected cards from Chinabank, GoTyme Bank, Metrobank, and UnionBank. Customers of other banks will need to wait until their issuer officially introduces support.
For eligible customers, however, Apple Pay offers a convenient way to pay without repeatedly taking out a physical card. Once everything is set up, making a transaction can be as simple as double-clicking a button, authenticating, and tapping your device on the reader.