
Apple Pay is finally available in the Philippines, and one of its biggest advantages is the ability to pay in physical stores using an iPhone or Apple Watch.
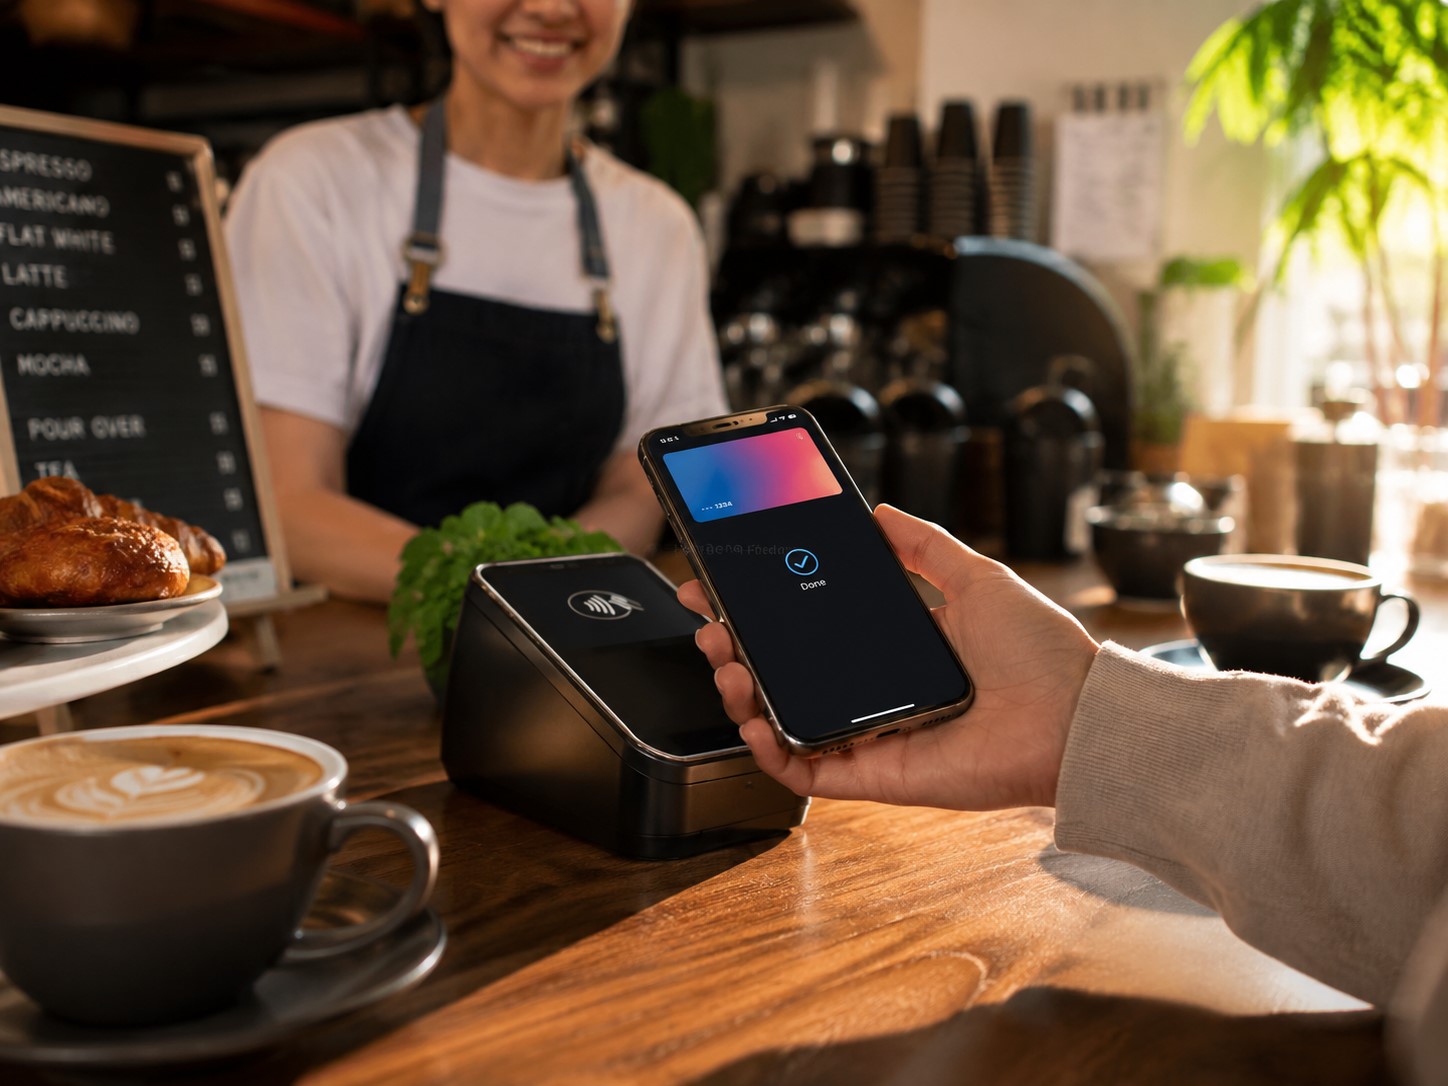
Instead of taking your debit or credit card out of your wallet, you can double-click a button, confirm your identity, and hold your device near the payment terminal. Once the transaction is approved, you will see a checkmark on the screen.
That is essentially the entire process.
However, if you are using Apple Pay for the first time, you may still have a few questions. Where exactly should you hold the phone? Do you need to open the Wallet app first? What should you tell the cashier? Will it work on every contactless terminal? Do you need to enter your card PIN?
This complete guide explains how to use Apple Pay in Philippine stores, including the exact steps for iPhones with Face ID and Touch ID, Apple Watch payments, changing cards, finding participating merchants, handling declined transactions, and protecting your device.
Content
Using Apple Pay in Stores at a Glance
Here is the basic process:
- Tell the cashier that you will pay by card or contactless payment.
- Wait for the cashier to enter the transaction amount.
- Double-click the appropriate button on your iPhone or Apple Watch.
- Select the card you want to use.
- Authenticate using Face ID, Touch ID, or your device passcode.
- Hold the device near the contactless reader.
- Wait for “Done,” a checkmark, a beep, or another payment confirmation.
- Collect your receipt when one is provided.
Apple says iPhone and Apple Watch users can pay at stores, restaurants, gas stations, taxis, and other places displaying the appropriate contactless-payment symbol. The merchant’s terminal must have NFC contactless payments enabled and must accept the network used by your card.
What Do You Need Before Paying?
Before trying Apple Pay at a store, make sure everything has already been set up.
You need:
- A compatible iPhone or Apple Watch
- An eligible card saved in Apple Wallet
- An active card from a participating issuer
- Face ID, Touch ID, or a device passcode
- A merchant with an NFC-enabled contactless terminal
- A merchant that accepts your card’s payment network
Apple Pay launched in the Philippines on August 4, 2026, with support from selected cards issued by Chinabank, GoTyme Bank, Metrobank, and UnionBank.
If your card has not yet been added, open Apple Wallet, tap the plus button, and complete the verification required by your bank before going to the store.
Which Devices Can You Use in a Physical Store?
For in-store contactless payments, you will normally use an:
- iPhone
- Apple Watch
An iPad or Mac may support Apple Pay for applications and websites, but you do not tap an iPad or Mac against an ordinary retail payment terminal.
Apple’s Philippine launch announcement confirms that Apple Pay is available across compatible iPhone, Apple Watch, iPad, and Mac devices, while Apple’s in-store instructions specifically direct customers to use an iPhone or Apple Watch at contactless readers.
How to Know Whether a Store Accepts Apple Pay
Look for either of these signs near the cashier or payment terminal:
- The Apple Pay logo
- The contactless-payment symbol, which usually looks like a sideways Wi-Fi icon
Apple says Apple Pay can be used where these symbols are displayed. However, it also warns that some terminals may show a contactless symbol even when the feature has not been properly enabled.
The merchant must also accept your card’s network.
For example, a terminal may support contactless payments, but the transaction could still fail when the merchant does not accept the Visa or Mastercard product connected to your Apple Wallet.
When you are uncertain, simply ask:
“Do you accept contactless card payments?”
You do not necessarily have to explain the entire Apple Pay process. From the merchant’s side, Apple Pay is processed through the terminal’s contactless-card function.
Philippine Merchants Announced at Launch
Apple identified several businesses that began offering Apple Pay when the service launched in the Philippines.
The announced in-store merchants included:
- Abenson
- Anko
- Ayala Malls
- Ayala Malls Cinemas
- Beyond the Box
- Coach
- Digimap
- Foot Locker
- Globe
- HOKA
- Hollister
- Jollibee
- Lush
- Power Mac Center
- Rustan’s
- SaladStop!
- Shake Shack
- Smart
- The Loop
- The Matcha Tokyo
- The Movie Snackbar
- The Underbelly
- WalterMart Supermarket
Apple said thousands of in-store and online Philippine merchants would accept Apple Pay from launch, with additional businesses expected to follow.
This should not be treated as a complete list. A business does not need to appear in Apple’s announcement to accept Apple Pay. Other merchants may be compatible when their terminals support NFC contactless transactions and their payment processors accept your card network.
Acceptance can also vary by:
- Branch
- Checkout counter
- Terminal model
- Payment processor
- Card network
- Temporary system availability
One branch may have an updated contactless terminal while another branch of the same company does not.
How to Use Apple Pay with an iPhone Using Face ID
Most newer iPhones use Face ID.
Here is the full process.
Step 1: Wait for the Cashier to Prepare the Terminal
The cashier usually needs to scan your items and enter the final amount before the terminal becomes ready.
Do not immediately place the iPhone on the terminal while the cashier is still preparing the transaction.
Step 2: Double-Click the Side Button
Quickly press the side button twice.
Your default payment card should appear on the screen.
You do not normally need to unlock the phone, find the Wallet app, or open your bank’s mobile application first. Apple’s official instructions say to double-click the side button on a Face ID-equipped iPhone to bring up the default card.
Step 3: Authenticate with Face ID
Look at the iPhone so Face ID can confirm your identity.
Hold the phone at a natural distance from your face. You do not need to position your face directly over the payment terminal.
When Face ID cannot recognize you, the phone may ask for your device passcode.
Step 4: Hold the Top of the iPhone Near the Reader
Move the top portion of your iPhone close to the contactless reader.
You do not need to press the phone flat against the terminal. Holding it a few centimeters away is normally enough.
Keep it in position until the transaction is recognized.
Step 5: Wait for Confirmation
When the payment is successfully transmitted, you should see:
- “Done”
- A checkmark
- A terminal confirmation
- A beep or sound from the reader
Apple instructs users to hold the top of the iPhone near the reader until “Done” and a checkmark appear.
The merchant may still need a moment to receive the final bank approval and print the receipt.
How to Use Apple Pay with an iPhone Using Touch ID
Some older supported iPhones use Touch ID and a Home button.
The steps are slightly different.
Step 1: Double-Click the Home Button
Double-click the physical Home button to display your default card.
Depending on your settings and iPhone model, you may be able to begin by resting your finger on Touch ID.
Step 2: Authenticate with Touch ID
Place your registered finger on the Home button.
Do not press and hold it too hard. Allow Touch ID to read your fingerprint.
Step 3: Hold the Top of the iPhone Near the Reader
Bring the top portion of the phone close to the contactless terminal.
Step 4: Wait for “Done”
Keep the phone near the reader until a checkmark or confirmation appears.
Apple’s instructions for Touch ID-equipped iPhones are to double-click the Home button, authenticate with Touch ID, and hold the top of the device near the reader until the transaction is confirmed.
How to Use Apple Pay with an Apple Watch
Paying with an Apple Watch can be even faster because you do not need to take your phone out of your pocket or bag.
Step 1: Make Sure the Watch Is Unlocked
Your Apple Watch needs a passcode, and it should already be unlocked on your wrist.
Wrist Detection helps the watch remain authenticated while you are wearing it. When you remove the watch, it normally locks again.
Step 2: Double-Click the Side Button
Quickly press the side button twice.
Do not press the Digital Crown. The side button is the flatter button beside it.
Your default payment card should appear.
Step 3: Choose Another Card When Necessary
Swipe or scroll through your available cards when you want to use a card other than the default.
Step 4: Hold the Watch Display Near the Reader
Turn your wrist so the Apple Watch display is close to the contactless terminal.
Keep the watch near the reader until you feel a gentle tap and hear a beep.
Apple’s official instructions say to double-click the Apple Watch side button, choose the desired card, and hold the display near the reader until the watch provides its confirmation.
Where Exactly Should You Hold the iPhone?
Hold the top of the iPhone close to the contactless reader.
The NFC hardware used for Apple Pay is located toward the upper part of the device. You do not need to place the center of the screen against the terminal.
Depending on the terminal, the contactless area may be located:
- On top of the keypad
- Along the side of the machine
- Near the screen
- Beside the contactless symbol
- On a separate reader connected to the point-of-sale system
When nothing happens, move the top of your phone slowly around the contactless symbol rather than repeatedly tapping the entire device against the terminal.
Do You Need to Open Apple Wallet First?
No.
For most in-store payments, you can go directly to your cards by double-clicking:
- The side button on a Face ID iPhone
- The Home button on a Touch ID iPhone
- The side button on an Apple Watch
Apple’s official payment instructions use these button shortcuts rather than requiring users to open Wallet manually.
You can still open Wallet yourself when you want to review your cards or recent transactions before paying.
Do You Need to Unlock the iPhone First?
Not in the usual way.
Double-clicking the appropriate button opens the Apple Pay interface. You then authenticate the payment through Face ID, Touch ID, or your passcode.
You do not have to unlock the phone, go to the Home Screen, and find the Wallet app before every purchase.
This is one of the main reasons Apple Pay can feel faster than opening a separate banking or e-wallet application.
How to Use a Different Card
Your default card appears first, but you are not required to use it.
On an iPhone:
- Double-click the side or Home button.
- Tap the default card or the cards shown at the bottom.
- Select another card.
- Authenticate using Face ID, Touch ID, or your passcode.
- Hold the top of the iPhone near the reader.
Apple provides this exact option for switching away from the default card before paying.
On an Apple Watch:
- Double-click the side button.
- Scroll through your cards.
- Stop on the card you want.
- Hold the watch near the reader.
This is useful when you want to choose a card that offers better:
- Cashback
- Rewards points
- Airline miles
- Dining benefits
- Grocery rewards
- Foreign transaction terms
How to Change Your Default Card
When one card is used more frequently, you can make it the default.
On an iPhone:
- Open Settings.
- Tap Wallet & Apple Pay.
- Select Default Card.
- Choose the card you prefer.
On an Apple Watch, open the Apple Watch app on the paired iPhone, go to Wallet & Apple Pay, and select the default card for the watch.
Changing the default saves time because that card appears first whenever you start an Apple Pay transaction.
What Should You Tell the Cashier?
You can say any of the following:
- “Card payment, please.”
- “Contactless payment.”
- “I’ll tap.”
- “Apple Pay.”
- “Do you accept contactless Visa or Mastercard?”
Some cashiers may not yet be familiar with the term Apple Pay because the service only launched locally on August 4, 2026. However, they may already know how to process an ordinary contactless card transaction.
The important thing is for the terminal to be placed in the correct card-payment mode.
Do You Need to Hand the Phone to the Cashier?
No.
You should keep control of your iPhone or Apple Watch.
The cashier only needs to prepare the payment terminal. You can authenticate the payment and hold your own device near the reader.
Do not give another person:
- Your device passcode
- Your Apple Account password
- Your card PIN
- Your bank-app login
- A one-time password
When someone asks to take the device away from you to “activate” or “verify” Apple Pay, stop the transaction and contact the bank through an official channel.
Do You Need to Enter a Card PIN?
It depends on the card issuer, merchant, terminal, purchase amount, and payment network.
Face ID, Touch ID, or the Apple Watch authentication confirms that you authorized the Apple Pay transaction. However, a terminal or issuer may still request additional verification in certain situations.
You may be asked to:
- Enter the card’s PIN
- Sign a receipt
- Use the physical card
- Complete another verification step
Do not enter your iPhone passcode into the merchant terminal. The code requested by a card terminal would normally be the PIN associated with the underlying card, when applicable.
Is There a Spending Limit?
Apple does not publish one universal Apple Pay spending limit for all Philippine users.
Your actual limit may depend on:
- Available bank balance
- Available credit limit
- Debit-card purchase limit
- Card issuer’s security rules
- Merchant transaction limits
- Terminal settings
- Card network
- Transaction type
For example, Metrobank publishes separate point-of-sale transaction limits for its debit cards, while other banks may allow users to view or manage limits inside their banking apps.
A large Apple Pay purchase may therefore be declined even when a smaller one succeeds.
Does Apple Pay Charge an Extra In-Store Fee?
Apple does not impose a separate customer fee simply because you paid with Apple Pay.
However, the usual terms of your card still apply.
Depending on the account and transaction, these may include:
- Foreign transaction fees
- Currency-conversion charges
- Credit-card interest
- Late-payment fees
- Other charges stated in your card agreement
Apple Pay changes how the card is presented to the terminal. It does not change the terms of the underlying debit or credit card.
Will You Still Earn Points, Miles, or Cashback?
Apple says customers continue receiving the normal rewards and benefits provided by their eligible cards when paying through Apple Pay.
Depending on your card, you may continue earning:
- Credit-card rewards
- Cashback
- Airline miles
- Go Rewards points
- Merchant benefits
- Other bank rewards
GoTyme, for example, promotes Apple Pay as an eligible way to use its card while continuing to earn applicable Go Rewards points.
A particular promotion may still have its own exclusions. Review the official mechanics before assuming that every Apple Pay purchase qualifies for a rebate or bonus.
Can You Use Apple Pay at Restaurants?
Yes, when the restaurant has a compatible NFC contactless terminal and accepts your card network.
Apple specifically says Apple Pay can be used in stores and restaurants wherever the appropriate contactless symbols are displayed.
At a restaurant, ask the staff to bring the terminal to you when possible. That allows you to keep your device in your possession while authenticating the payment.
When the restaurant processes card payments at a counter, follow the same steps used at any other retail store.
Can You Use It at Supermarkets?
Yes, provided the supermarket’s checkout terminal supports contactless payments.
WalterMart Supermarket was among the Philippine merchants named in Apple’s launch announcement. Other supermarkets may also accept Apple Pay when their terminals and payment processors are compatible.
Because acceptance may differ by branch or checkout lane, look for the contactless symbol or ask the cashier before preparing the payment.
Can You Use Apple Pay at Jollibee?
Jollibee was included among Apple’s launch merchants in the Philippines. Apple also identified Jollibee’s app and website among the online checkout channels offering Apple Pay.
In-store availability may still depend on the particular branch and working payment terminal.
Ask for a contactless card payment and check the terminal for the appropriate symbol.
Can You Use Apple Pay at Ayala Malls?
Apple named Ayala Malls and Ayala Malls Cinemas among its Philippine launch merchants.
This does not automatically mean that every independent tenant inside an Ayala mall accepts Apple Pay. Each store can have its own terminal, bank, and payment processor.
Apple Pay availability at a mall-operated cinema or facility is different from acceptance at every shop inside the building.
Can You Use Apple Pay at SM Malls?
SM was not among the specific merchant names in Apple’s August 4 launch announcement.
However, an individual store inside an SM mall may still accept Apple Pay when it has an enabled contactless terminal and accepts the network of your linked card.
Check each store or cashier separately rather than assuming that the entire mall has one payment policy.
Can You Use Apple Pay at Any Store with a Card Terminal?
No.
A card terminal must support NFC contactless payments. A terminal that only accepts inserted or swiped cards may not work with Apple Pay.
The merchant also needs to accept your card’s network. Apple notes that even some terminals displaying the contactless symbol may not be properly configured to accept contactless transactions.
Does Apple Pay Work with QR Ph?
Apple Pay and QR Ph are different payment systems.
For an ordinary Apple Pay purchase in a physical store, you hold your device near an NFC-enabled contactless terminal.
For QR Ph, you usually open a participating bank or e-wallet app and scan a merchant QR code.
A merchant that only displays a QR Ph code may not accept Apple Pay. Likewise, an Apple Pay-compatible contactless terminal does not automatically mean the merchant accepts QR Ph.
Some establishments may offer both options.
Do You Need to Open a Banking App?
No.
After the card has been added and activated in Apple Wallet, you do not normally need to open the bank’s app for every purchase.
Apple describes in-store Apple Pay as a process of double-clicking the appropriate button, authenticating, and holding the device near the reader.
You may still open the banking app when you want to:
- Check your available balance
- Review a complete transaction history
- Unlock a card
- Adjust a card limit
- Report a suspicious transaction
- Contact the bank
What Happens After You Tap?
Apple Pay does not simply send the actual card number printed on your physical card.
Apple says a unique Device Account Number is created and securely stored in the device’s Secure Element. When you pay, the system uses device-specific payment information instead of storing or directly sharing the original card number.
The transaction request then goes through the merchant, payment network, and your bank or card issuer for approval.
The issuer checks factors such as:
- Available funds or credit
- Card status
- Transaction limits
- Security rules
- Possible fraud indicators
- Merchant category
- International-use settings
The terminal then displays whether the payment was approved or declined.
Does the Merchant See Your Physical Card Number?
Apple states that it does not store the original card numbers used with Apple Pay, and Apple Pay is designed so the merchant does not receive the number printed on your physical card during the transaction.
The digital payment credential associated with the device is different from the physical card number.
This can also explain why a merchant may see different final digits on an Apple Pay receipt.
How to Check a Transaction After Paying
On your iPhone:
- Open Wallet.
- Select the card you used.
- Review the recent transactions shown below the card.
- Tap a transaction for more details.
The information shown in Wallet may vary by issuing bank.
Your bank’s official app or monthly statement remains the best source for the final posted amount, exchange rate, rewards, and billing information.
Should You Keep the Receipt?
Keeping the receipt is useful, especially for:
- Large purchases
- Warranty claims
- Returns
- Refunds
- Transactions that appear delayed or duplicated
- Purchases where the terminal initially showed an error
The Apple Pay card number shown to the merchant may be different from your physical card’s final digits. A receipt can help the merchant locate the correct transaction later.
How Do Refunds Work?
Refunds are generally handled according to the merchant’s normal return policy.
The merchant may ask you to:
- Present the device used for payment
- Provide the receipt
- Select the same card in Apple Wallet
- Provide the final digits of the Apple Pay card number
The refund should be returned to the underlying card account rather than paid into a separate Apple Pay balance.
Processing time depends on the merchant, payment network, and issuing bank.
Why Was Your Apple Pay Payment Declined?
There are many possible reasons.
Insufficient Funds
A debit-card account may not have enough available money.
Insufficient Available Credit
A credit card may have reached or approached its limit.
Card Is Locked
The card may have been temporarily frozen through the bank’s app.
Transaction Limit Was Reached
The amount may exceed the card’s daily or point-of-sale limit.
Merchant Does Not Accept the Network
The terminal may accept some card networks but not the network of your selected card.
Contactless Feature Is Not Enabled
The terminal may display the symbol but not be configured correctly.
Bank Security Block
The issuer may consider the transaction unusual.
International Transactions Are Disabled
This can happen when using Apple Pay overseas or when a transaction is processed through a foreign merchant.
Temporary System Problem
The bank, network, merchant terminal, or payment processor may be experiencing an outage.
Apple explains that Apple Pay transactions are routed to the card issuer for approval. When a card is declined, Apple directs customers to contact the bank or card issuer for the specific reason.
What to Do When Apple Pay Does Not Work
Try these steps:
- Keep the iPhone or Apple Watch near the reader for another moment.
- Move the top of the iPhone closer to the contactless symbol.
- Ask the cashier to restart the card-payment transaction.
- Confirm that the terminal supports contactless payments.
- Select another card in Apple Wallet.
- Check whether the card is locked.
- Confirm that you have sufficient funds or credit.
- Try the physical card.
- Ask to use another payment terminal.
- Contact the issuing bank when the card continues to be declined.
If the physical card also fails, the problem is more likely related to the card account or issuer rather than Apple Pay.
What If the Terminal Does Not Detect the iPhone?
Check the position first.
Hold the top of the iPhone close to the part of the terminal displaying the contactless symbol.
Also make sure:
- You already authenticated with Face ID or Touch ID.
- The card is showing “Hold Near Reader.”
- The cashier has activated the terminal.
- Your phone case does not contain thick metal accessories.
- The payment terminal supports NFC.
- The reader is not frozen or disconnected.
Try another terminal when one is available.
What If Apple Pay Says “Done,” but the Cashier Says It Failed?
“Done” indicates that the phone completed its side of the contactless interaction, but the merchant must still receive the final transaction result.
Wait for the cashier’s terminal to display the approval.
If the terminal reports a failure:
- Do not immediately repeat the payment several times.
- Ask the cashier to check whether a transaction was recorded.
- Review Wallet and your bank app.
- Keep the receipt or error slip.
- Use another payment method when necessary.
A temporary authorization may sometimes appear before the transaction is reversed or finalized. Your bank can confirm the actual status.
What If You Are Charged Twice?
First, review the transactions in your bank’s app.
One entry may be:
- A pending authorization
- A completed purchase
- A temporary duplicate that will later disappear
- A genuinely duplicated charge
Keep the receipt and contact the merchant first when both charges have posted.
When the merchant cannot resolve the issue, contact the bank and follow its dispute process.
Can You Cancel a Payment After Tapping?
Once a transaction has been authorized and processed, Apple Pay does not provide a general “undo” button.
The cashier or merchant must cancel, void, or refund the transaction through its payment system.
Speak to the merchant immediately when:
- The wrong amount was entered.
- The wrong item was charged.
- You accidentally used the wrong card.
- The purchase needs to be cancelled.
Can You Use Apple Pay When the Phone Battery Is Low?
A low battery does not automatically stop a normal Apple Pay transaction as long as the iPhone is still powered on, functioning, and able to authenticate you.
Once the phone has completely shut down, regular card payments through Wallet may no longer be available.
Bring a physical card, cash, or another payment method when you are traveling or expect to be away from a charger for a long period.
Can You Use Apple Pay While Wearing a Face Mask?
Face ID performance depends on the iPhone model and settings.
When Face ID does not recognize you, the device can ask for your passcode.
You can also use an Apple Watch or a Touch ID-equipped iPhone when available.
Enter your device passcode only on your own iPhone—not on the merchant’s terminal.
Is Apple Pay Safe in Crowded Stores?
Apple Pay transactions generally require authentication through Face ID, Touch ID, Apple Watch, or a device passcode. Apple says it does not store the original payment-card number and does not retain transaction information that can be tied directly to the user.
Still, follow normal precautions:
- Keep control of your device.
- Cover the screen when entering your passcode.
- Do not tell anyone your passcode.
- Avoid responding to unexpected verification requests.
- Review your transactions regularly.
- Enable Find My.
- Report a lost device promptly.
What Happens If Your iPhone Is Lost?
Use the Find My service to mark the device as lost.
Apple says Lost Mode can suspend Apple Pay on the device without requiring you to immediately cancel every physical card. You can also remotely erase the device or remove its payment capability through your Apple Account.
Contact your bank or card issuer as well when:
- You cannot locate the device.
- You suspect someone knows the passcode.
- You see an unfamiliar transaction.
- The device was stolen.
The issuer can suspend the Apple Pay payment credential associated with the lost device.
Apple Pay In-Store Tips for First-Time Users
Prepare Before Reaching the Counter
Make sure your card is already active in Wallet.
Start with a Small Purchase
Testing it on an inexpensive transaction can help you become familiar with the process.
Look for the Contactless Symbol
Do not assume that every terminal accepts tap payments.
Wait for the Cashier
The terminal must be ready before you hold your device near it.
Hold the Correct Part of the Device Near the Reader
Use the top of the iPhone or the display side of the Apple Watch.
Keep a Backup Payment Method
Apple Pay is still new in the Philippines, and not every terminal or branch will support it immediately.
Check Your Bank App Afterwards
Confirm that the correct card and amount were charged.
Avoid Repeated Taps
When the transaction seems delayed, ask the cashier to check the terminal before trying again.
Frequently Asked Questions
Is Apple Pay already available in Philippine stores?
Yes. Apple Pay officially launched in the Philippines on August 4, 2026, with thousands of in-store and online merchants expected to accept it.
How do I use Apple Pay at a cashier?
Double-click the side or Home button, authenticate, and hold your iPhone or Apple Watch near the contactless reader.
Do I need to open Wallet?
No. Double-clicking the appropriate button normally displays your default card.
Do I need to unlock my iPhone first?
You do not need to go through the ordinary unlocking process. Apple Pay will ask you to authenticate using Face ID, Touch ID, or your passcode.
Where should I hold the iPhone?
Hold the top of the iPhone near the contactless symbol on the terminal.
Can I use Apple Watch without taking out my iPhone?
Yes. Double-click the watch’s side button, choose a card, and hold the display near the reader.
Can I use a different card?
Yes. Tap the default card on the iPhone or scroll through the cards on Apple Watch before paying.
Does every contactless terminal accept Apple Pay?
Not necessarily. The contactless feature must be enabled, and the merchant must accept your card network.
Can I use Apple Pay at Jollibee?
Jollibee was included among the Philippine launch merchants. Availability may still vary by branch and terminal.
Can I use it at WalterMart?
WalterMart Supermarket was also included among the launch merchants.
Can I use Apple Pay at restaurants?
Yes, when the restaurant has a compatible NFC contactless terminal.
Do I need to enter a PIN?
It depends on the bank, terminal, card, and transaction. Additional verification may occasionally be required.
Is there an Apple Pay transaction limit?
Apple does not set one universal limit. Your bank, merchant, card network, and available balance or credit can determine the applicable limit.
Will I still earn rewards?
Apple says the normal eligible rewards and benefits of your linked card continue to apply.
Why was my payment declined?
The bank or card issuer makes the approval decision. Check your funds, card status, limits, and network acceptance, then contact the issuer when necessary.
Can the cashier see my physical card number?
Apple Pay is designed to use device-specific payment information instead of sharing the original card number with the merchant.
Should I carry my physical card?
It is still advisable, especially while Apple Pay acceptance is expanding across the Philippines.
Final Thoughts
Using Apple Pay in a Philippine store is simple once your eligible card has been added to Apple Wallet.
When it is time to pay, double-click the side or Home button, choose your card, authenticate through Face ID, Touch ID, or your passcode, and hold your iPhone near the contactless reader. Apple Watch users can double-click the watch’s side button and hold the display near the terminal.
The biggest challenge during the early rollout may not be using Apple Pay itself. It will be finding out whether a particular branch, cashier, or terminal is ready to accept it.
Look for the contactless symbol, ask whether the terminal accepts tap payments, and keep a backup payment method available. As more Philippine banks and merchants adopt Apple Pay, using an iPhone or Apple Watch at checkout should become more familiar and convenient.
For now, start with a small purchase, wait for the checkmark, and enjoy making your first tap-to-pay transaction without taking your physical card out of your wallet.


